Ingesting data from Iceberg into Mach5
This document explains how to ingest data from Iceberg tables (backed by a REST or Polaris catalog) into a Mach5 Search index by configuring connections, setting up ingest pipelines, and verifying ingestion using the Mach5 UI.
Prerequisites
- This document assumes that Mach5 is deployed and running successfully. Mach5 Administrative UI page looks as below. Lets assume it’s running at http://localhost:8888/

- Store, store route and warehouse are created successfully. Refer to Quickstart document for help
- Consider there is a sample table in your Iceberg instance as shown:
create table m5.m5demo (id integer, name string);
insert into m5.m5demo values (1, 'Alice');
insert into m5.m5demo values (2, 'Bob');
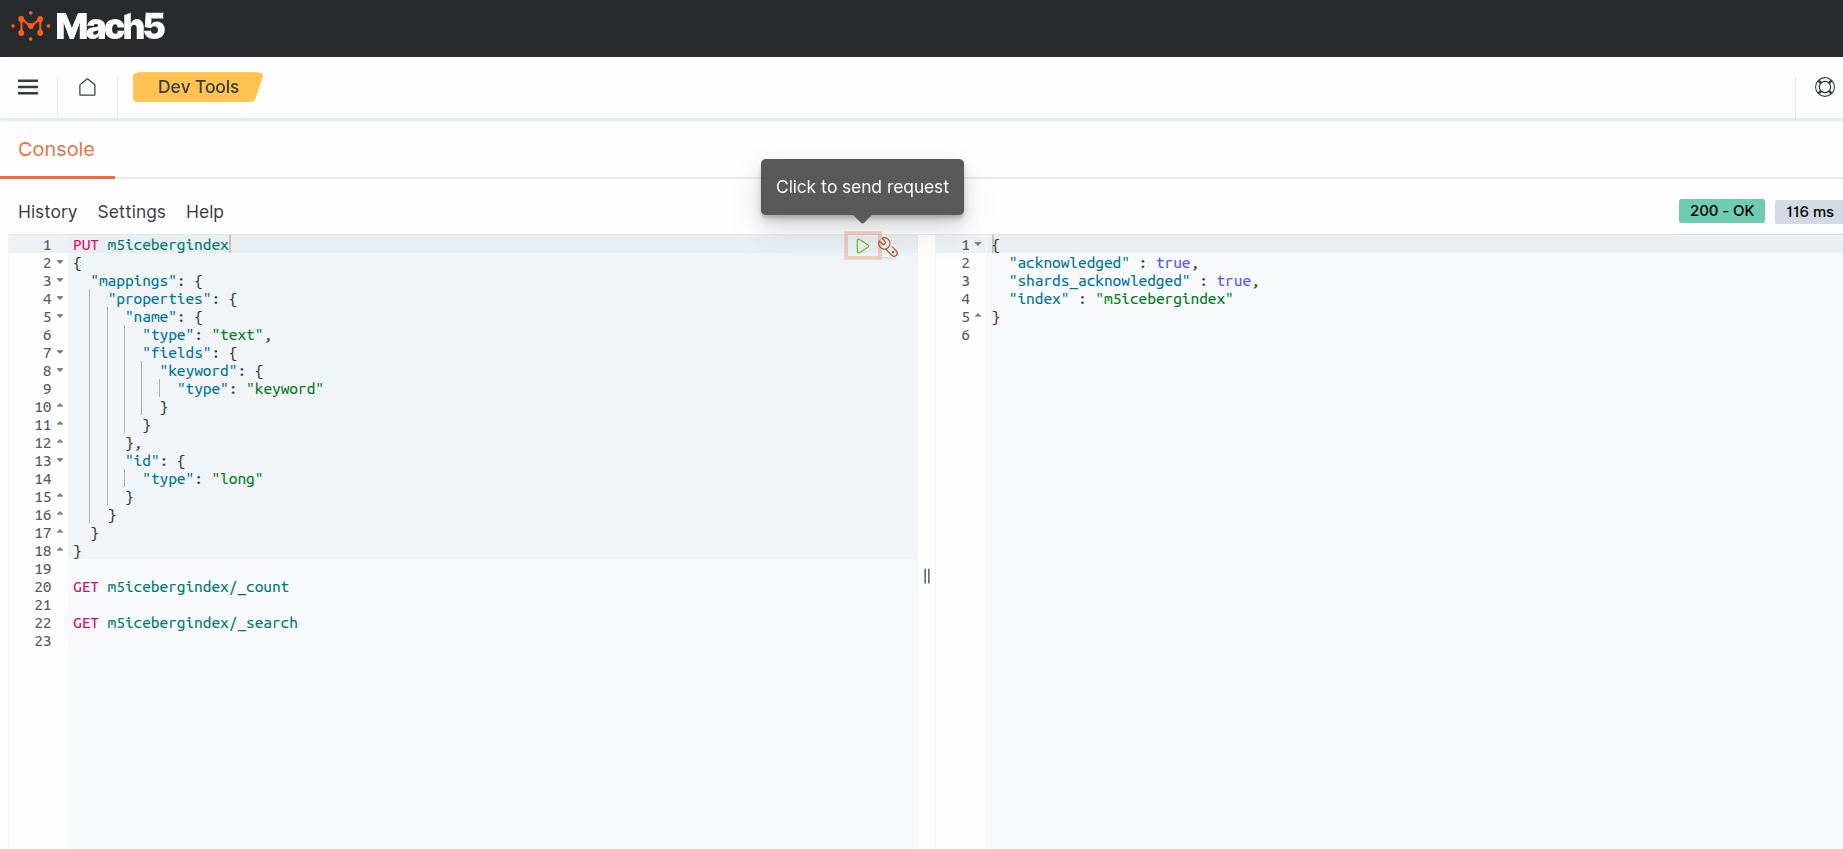
- Mach5 Index is already created with the name m5icebergindex and with relevant mappings for the iceberg data as shown below. If no mappings are provided, Mach5 will dynamically infer the mapping when ingesting data. Please note that some data may not get ingested if mappings are not provided. In Mach5 Dashboards - Dev Tools, create the Mach5 Index with mappings as follows:
PUT m5icebergindex
{
  "mappings": {
    "properties": {
      "name": {
        "type": "text",
        "fields": {
          "keyword": {
            "type": "keyword"
          }
        }
      },
      "id": {
        "type": "long"
      }
    }
  }
}
Connections
Connection is the resource or the entity which stores the properties needed to connect or access the source where the data resides, for instance in Iceberg, Kafka or S3. It is important to note that the same connection can be used in multiple ingest pipelines.
To enable Iceberg integration, two connections need to be configured:
- Connection for accessing the S3/MinIO storage layer
- Connection for Iceberg catalog
Click on Connections on the left panel of Mach5 UI
S3 connection
This S3 connection will point to the object store or file system where the underlying data files and metadata for an iceberg index are present. For e.g., S3 compatible object store MinIO, or S3.
Prerequisites for an S3 connection creation: Create a secret to store the MinIO password. Store the minIO credentials in a secret file, say iceberg-secret.yaml as follows.
# File iceberg-secret.yaml
apiVersion: v1
kind: Secret
metadata:
  name: iceberg-secret
data:
  key: cGFzc3dvcmQ= #password , Change this value to your base64 encoded password value.
Apply the changes to create the secret using:
# kubectl apply -f iceberg-secret.yaml -n mach5
Adding a new S3 connection
Click on + icon on Connections page to create a new connection
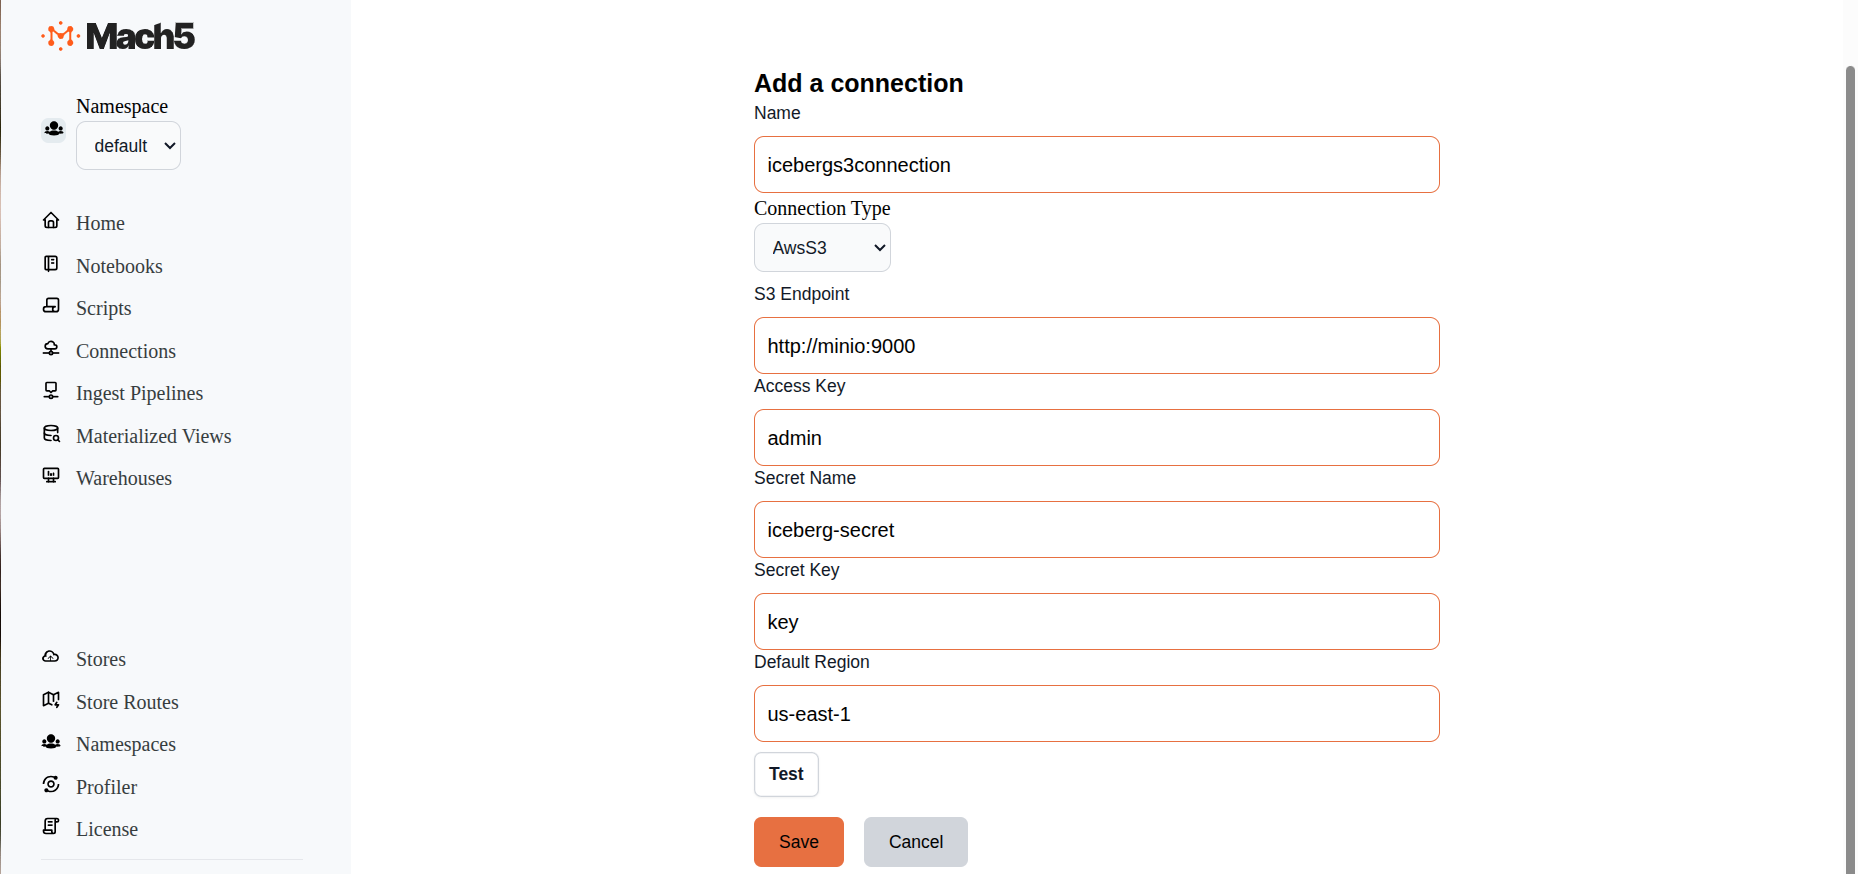
- Name: Provide a name for the connection, eg. icebergs3connection
- ConnectionType: There are 3 options in dropdown: AwsS3, Iceberg, Kafka. Choose AwsS3
- S3 Endpoint: For an AWS deployment, this can be empty. For S3 compatible object stores, like MinIO, specify that endpoint http://minio:9000
- Access Key: For an AWS deployment, this can be empty. For S3 compatible object stores, like MinIO, specify username of that MinIO instance.
- Secret Name: For an AWS deployment, this can be empty. For S3 compatible object stores, like MinIO, specify the name of the secret that we created above, say iceberg-secret
- Secret Key: For an AWS deployment, this can be empty. For S3 compatible object stores, like MinIO, specify Key specified in the secret, eg key
- Default Region: Specify the specific AWS region for the S3 endpoint. Default value is us-east-1
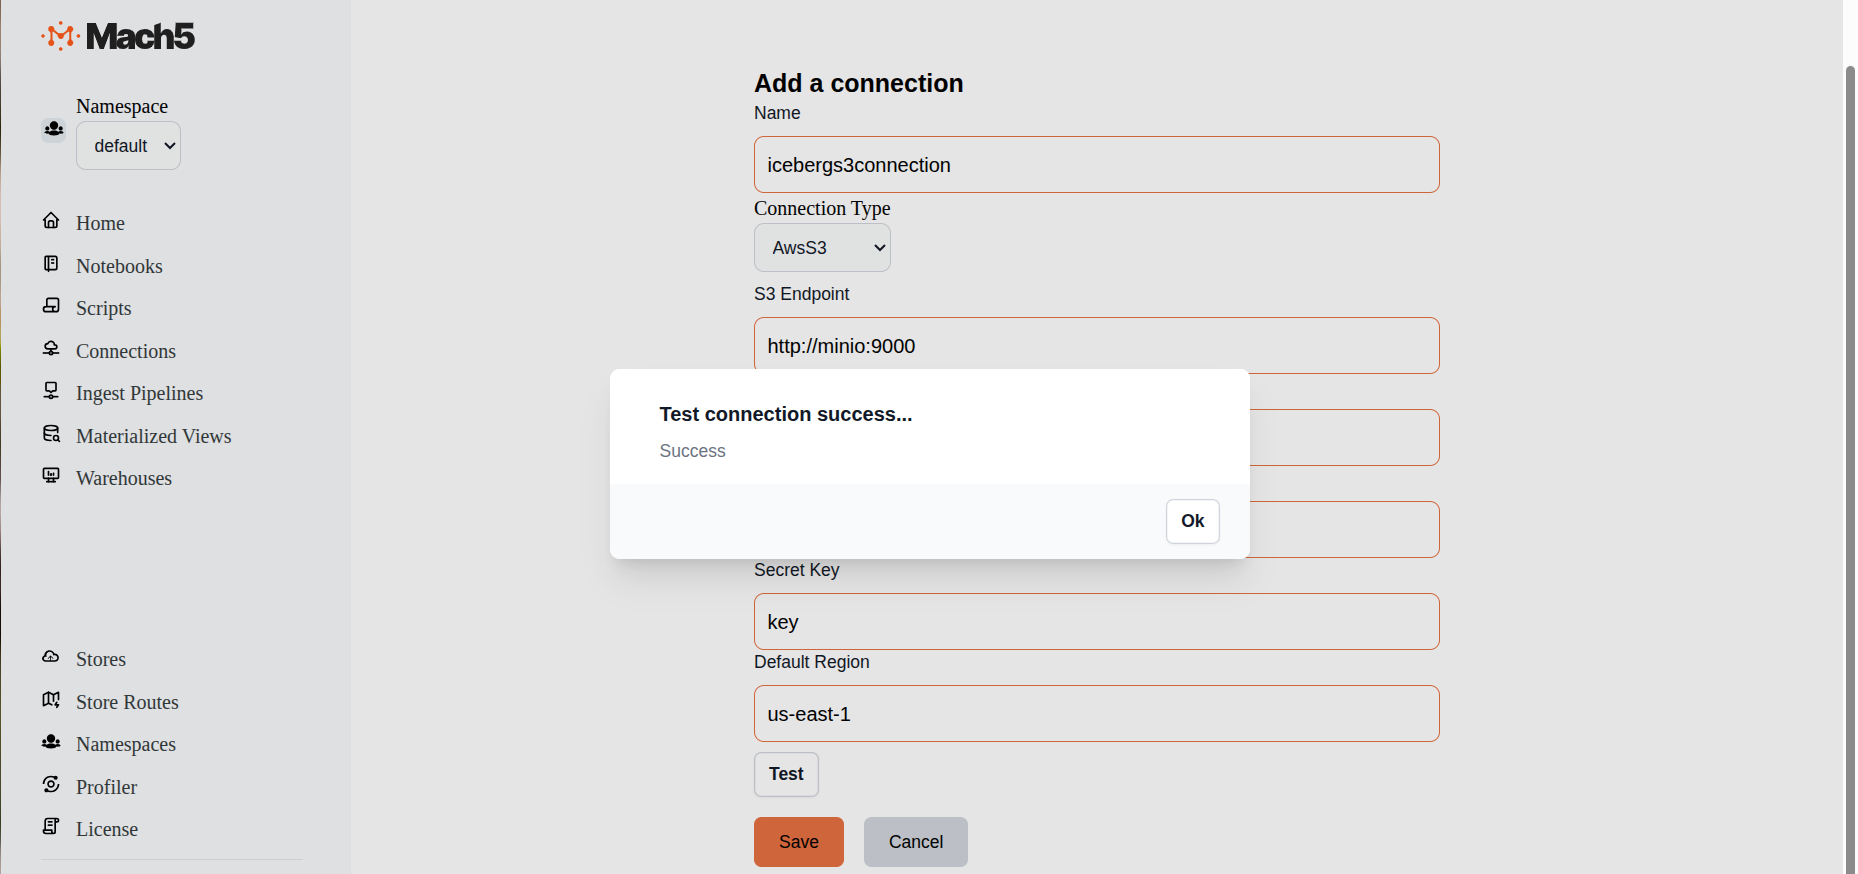
- Test: Click on the Test button to verify connectivity to S3
- Click on Save
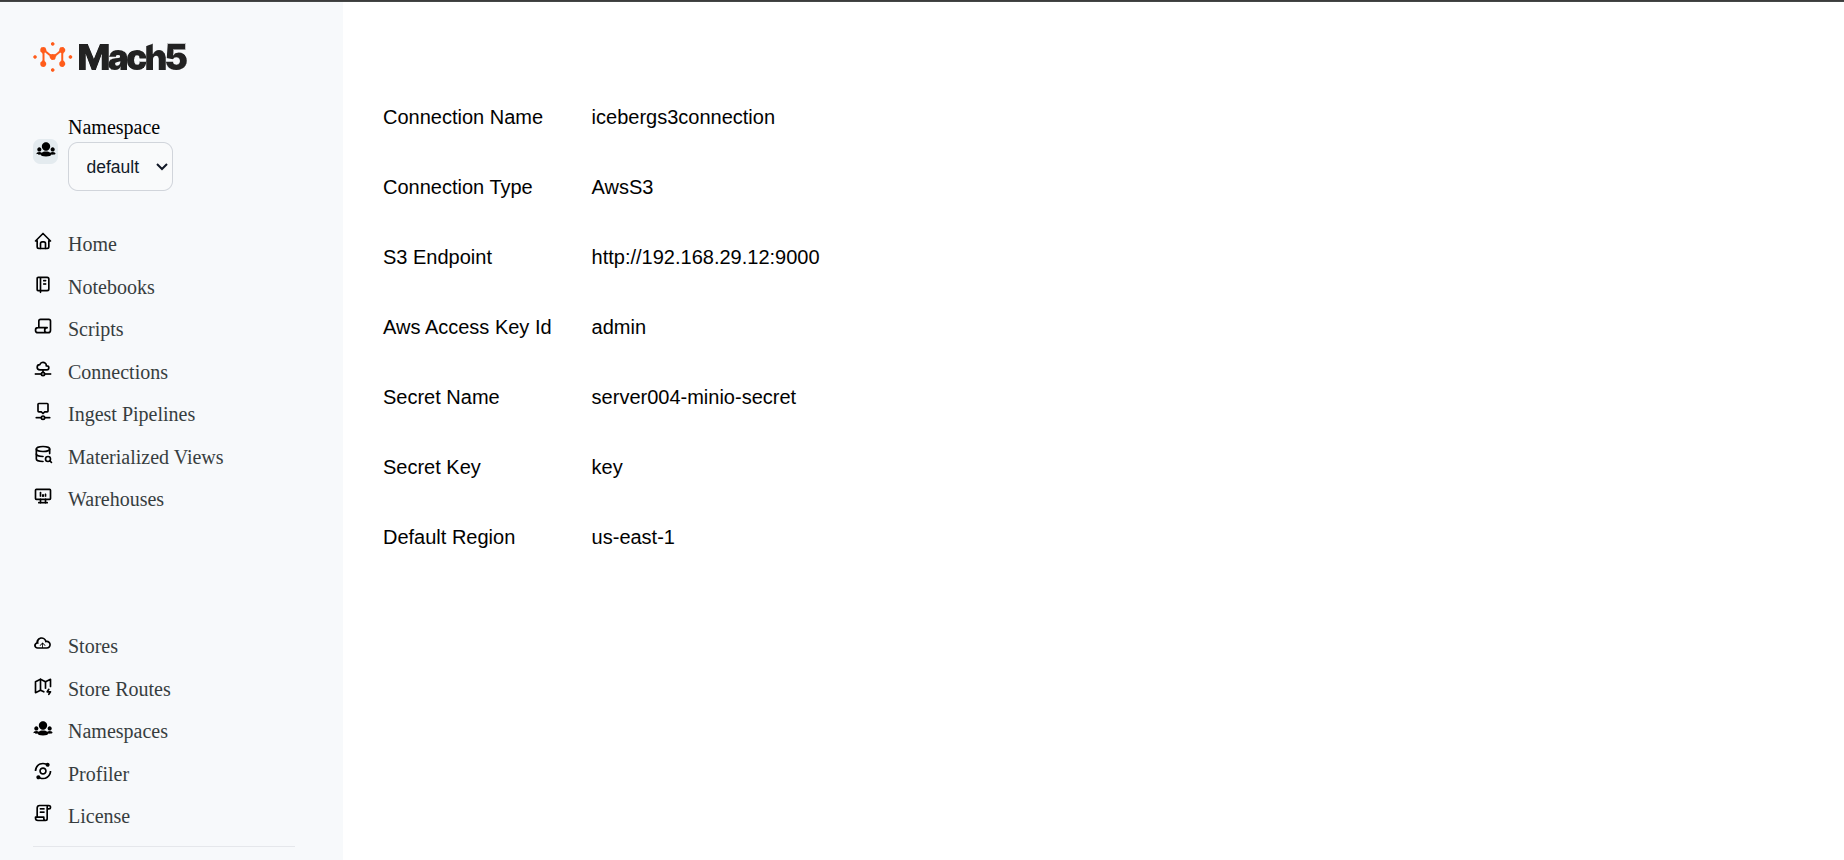
Verify S3 connection creation
Verify that the new S3 connection is created in the Connections page
Iceberg connection
Iceberg connections are supported via the REST catalog or the Apache Polaris catalog. Details are given below for configuring either of the two ways:
Adding a new Iceberg connection via REST catalog
Click on + icon on Connections page to create a new connection
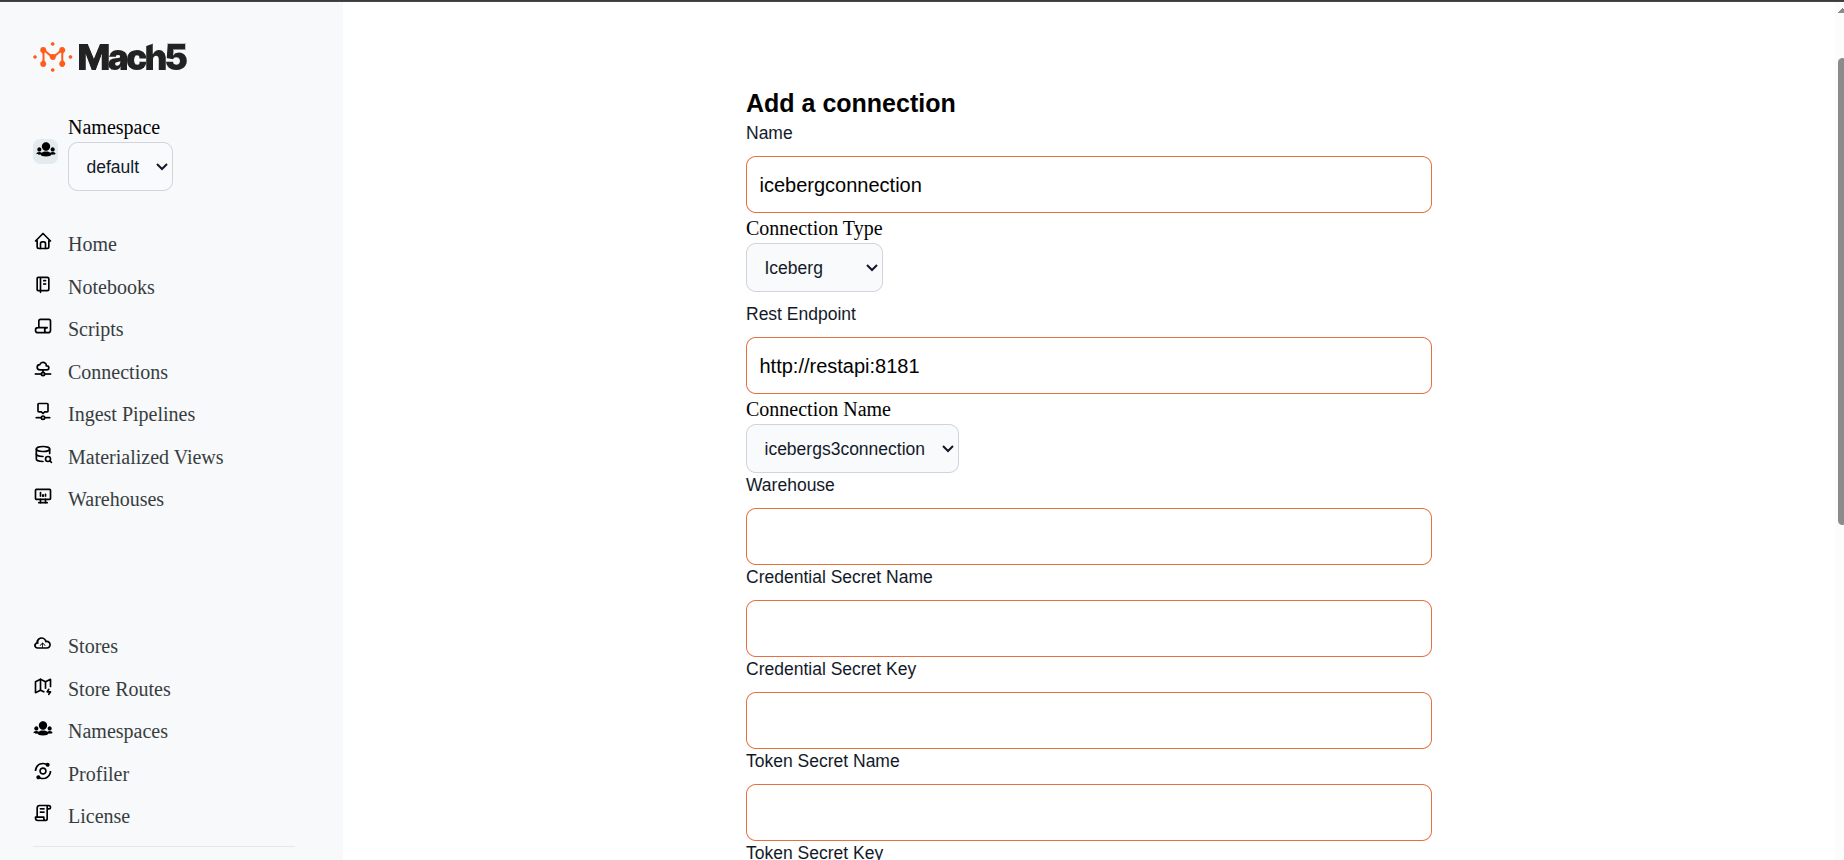
- Name: Provide a name for the connection, eg. icebergconnection
- ConnectionType: There are 3 options in dropdown: AwsS3, Iceberg, Kafka. Choose Iceberg
- Rest Endpoint: Specify the URL to the REST endpoint, e.g., http://restapi:8181
- Connection Name: Choose the previously created S3 connection icebergs3connection from the dropdown menu.
- Leave all other fields empty
- Test: Click on the Test button to verify connectivity to Iceberg
- Click on Save
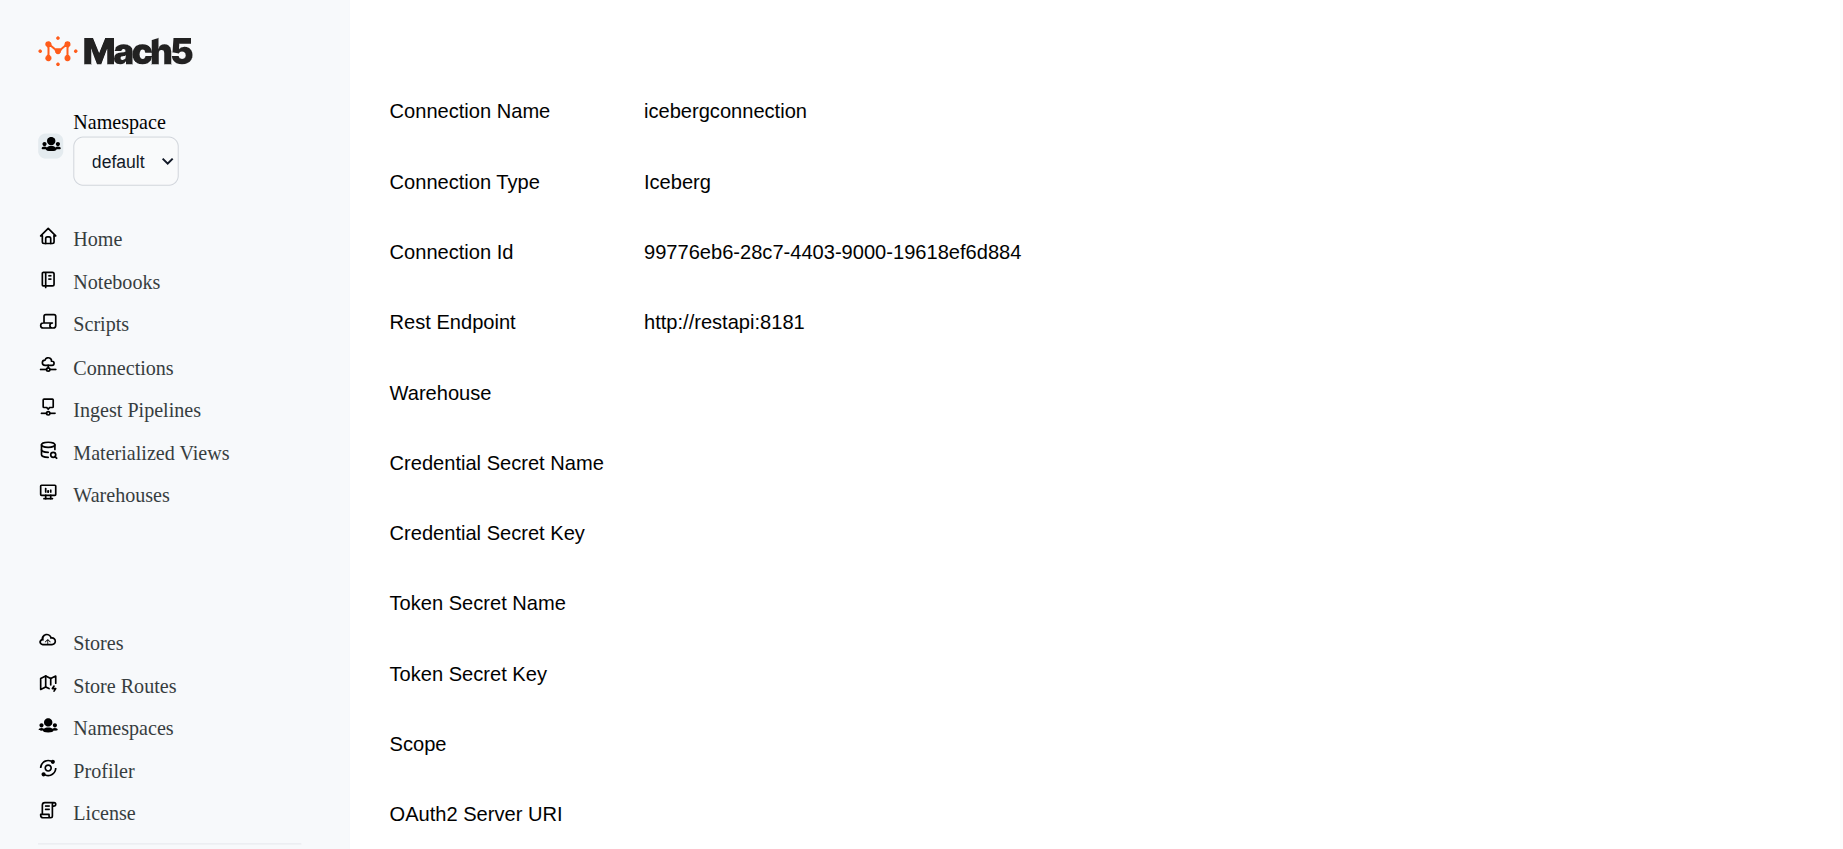
Verify Iceberg connection creation
Verify that the new Iceberg connection backed by REST catalog is created in the Connections page
Adding a new Iceberg connection via Apache Polaris catalog
Prerequisites for an Iceberg connection creation backed by Apache Polaris catalog are:
Create a secret to store the polaris password. The secret key should be the base64 encoded value of clientid:clientsecret from Apache Polaris. Store the credentials in a secret file, say polaris-secret.yaml as follows.
# File polaris-secret.yaml
apiVersion: v1
kind: Secret
metadata:
  name: polaris-secret
data:
  key: Y2xpZW50aWQ6Y2xpZW50c2VjcmV0 #password , Change this value to your base64 encoded clientid:clientsecret value
Apply the changes to create the secret using:
# kubectl apply -f polaris-secret.yaml -n mach5
Click on + icon on Connections page to create a new connection
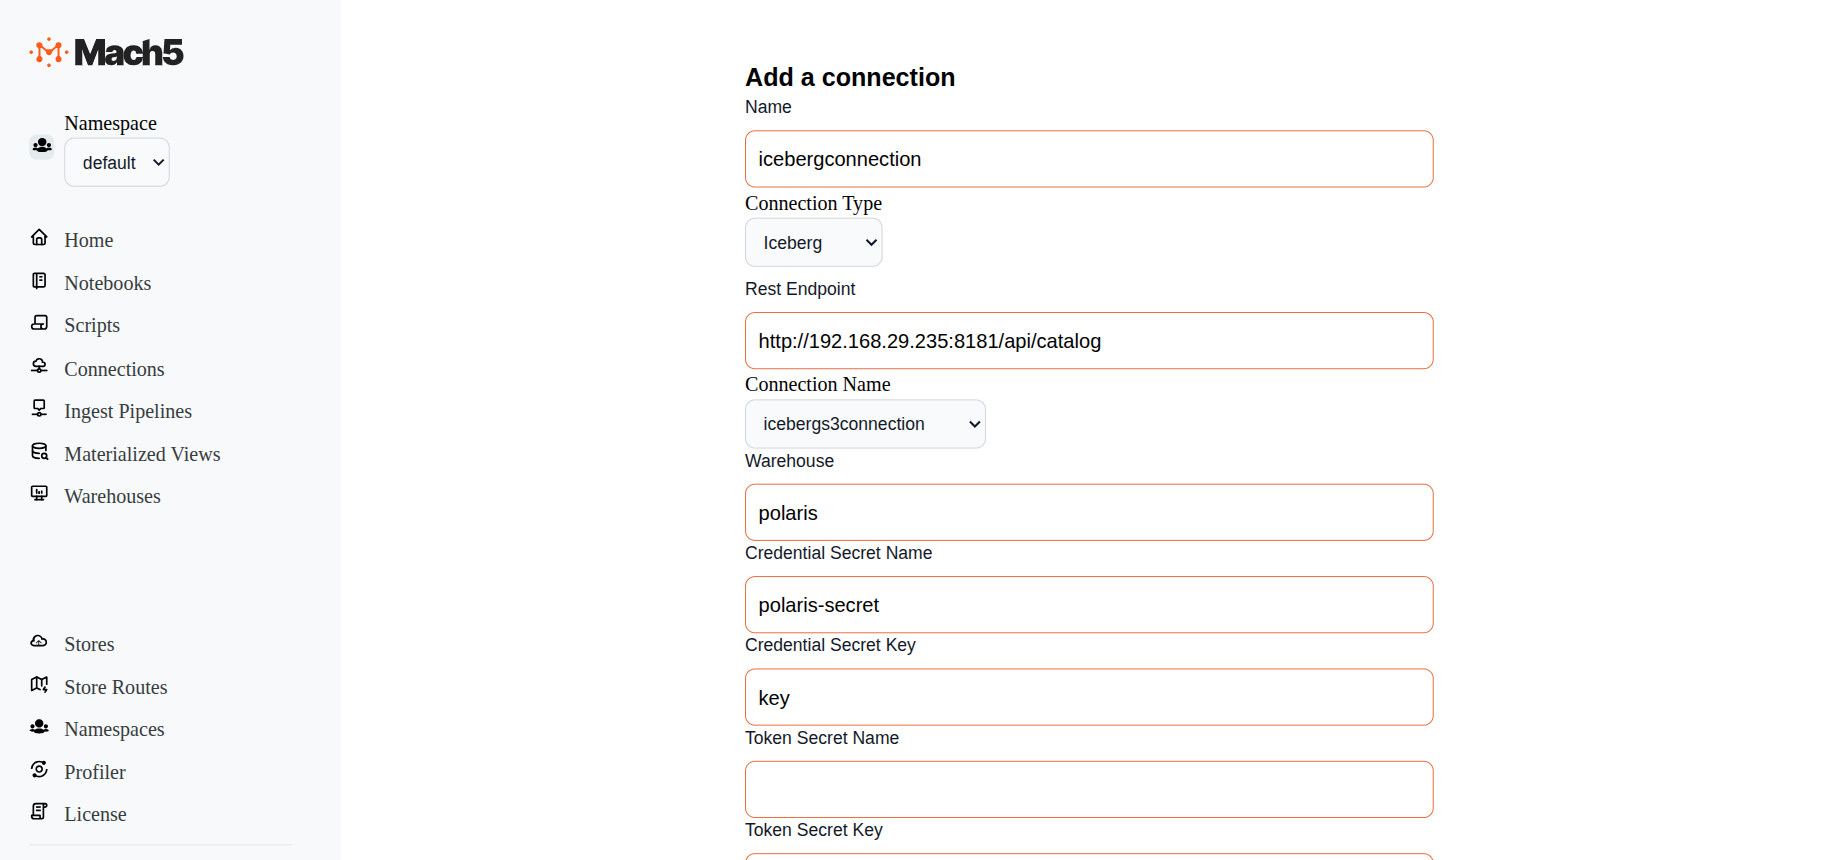
- Name: Provide a name for the connection, eg. icebergconnection
- ConnectionType: There are 3 options in dropdown: AwsS3, Iceberg, Kafka. Choose Iceberg
- Rest Endpoint: Specify the URL to the Apache Polaris endpoint, e.g., http://192.168.29.235:8181/api/catalog
- Connection Name: Choose the previously created S3 connection icebergs3connection from the dropdown menu.
- Warehouse: Name of the Polaris warehouse, eg. polaris
- Credential Secret Name: Specify the name of the secret that we created above, say polaris-secret
- Credential Secret Key: Specify Key specified in the secret, eg key
- Scope: Specify the role. eg. PRINCIPAL_ROLE:ALL
- Remaining options are for authentication to Apache Polaris via other authentication methods. For now leave them as empty.
- Test: Click on the Test button to verify connectivity to Iceberg
- Click on Save
Verify Iceberg connection creation
Verify that the new Iceberg connection backed by Apache Polaris catalog is created in the Connections page

Ingest Pipelines
Mach5 Search ingest pipelines allow you to process and ingest documents from various different sources like Iceberg, Kafka, S3 bucket, etc. This is useful for transforming, enriching, or modifying data at ingestion time. To access the source data, ingest pipeline needs the specific connection to source data. For example if we are creating an ingest pipeline to index data from Iceberg as data source, then you need a connection of type Iceberg
Click on Ingest Pipelines on the left panel of Mach5 UI
Add an ingest pipeline
Click on + icon on Ingest Pipelines page to create a new ingest pipeline
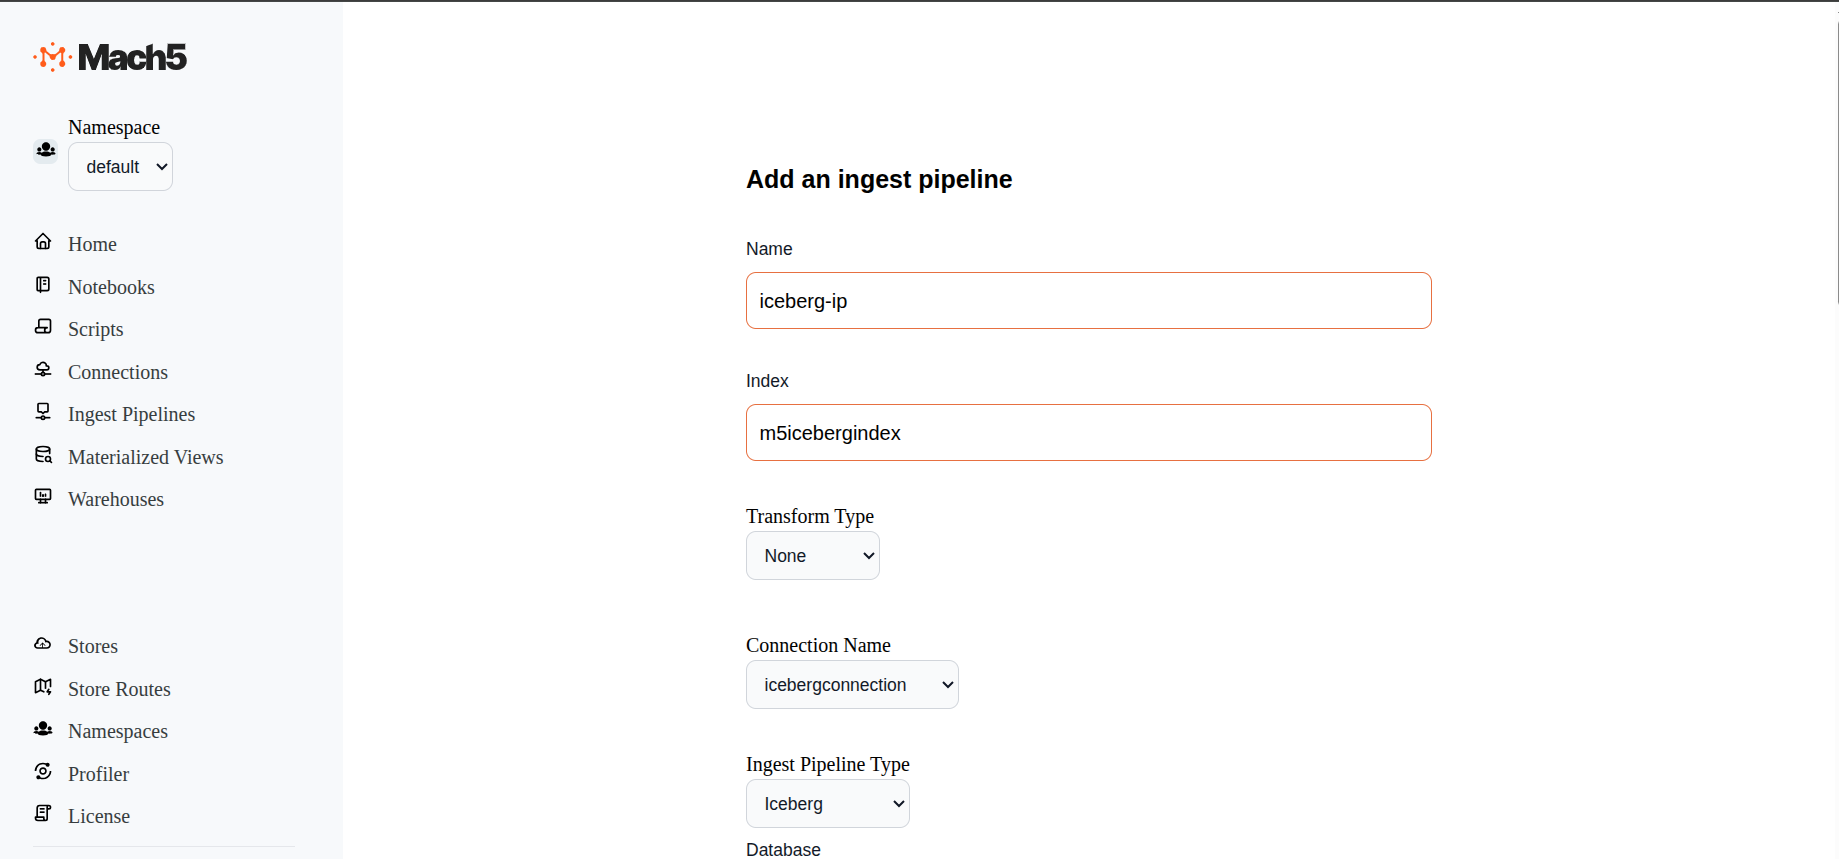
- Name: Provide name of the ingest pipeline, eg. iceberg-ip
- Index: Specify name of the Mach5 index eg. m5icebergindex Please note that the index must be created in Mach5 prior to configuring the ingest pipeline
- Transform Type: Select options between None or Javascript. This helps to transform data before ingestion. If Javascript is selected, specify the script details in the given box
- Connection Name: Select the Iceberg connection name that was created earlier
- Ingest Pipeline Type: Options are S3, Iceberg, Kafka. Select Iceberg
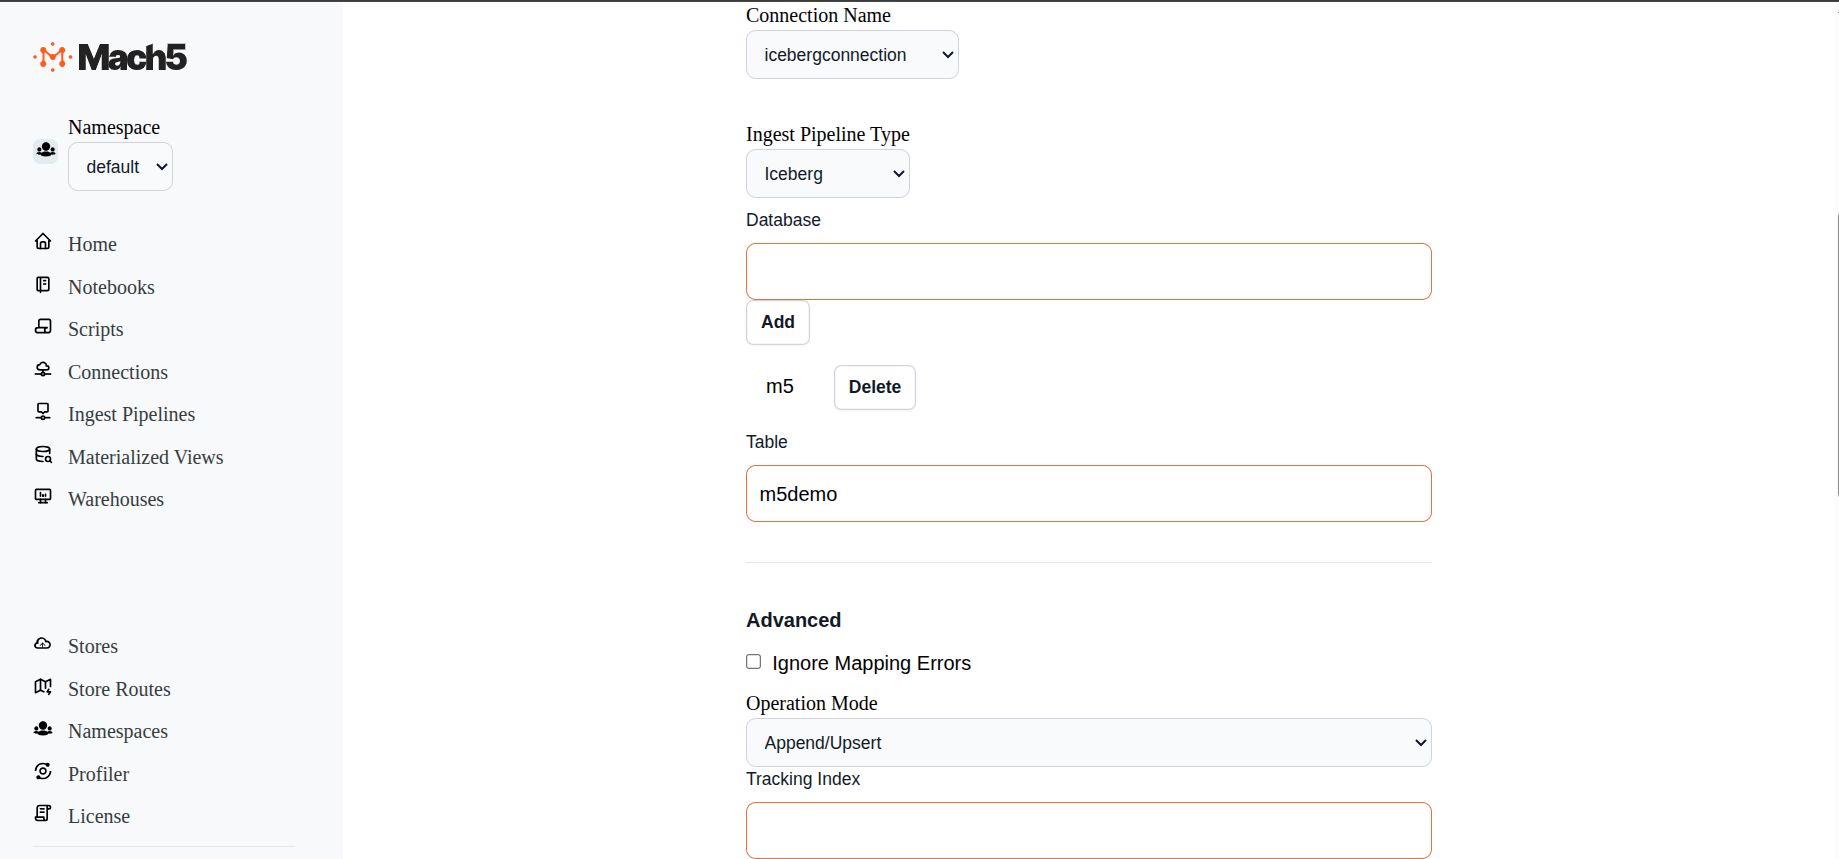
- Database: Provide the database name that was created in Iceberg, eg. m5 . Click on Add. Nested databases are allowed
- Table: Provide the table name that was created in Iceberg database, eg m5demo
- Advanced: Leave the advanced section as default, Operation Mode being Append/Upsert
- Enabled: Select this checkbox to Enable the Ingest Pipeline
- Click on Save
- Once the ingest pipeline is created, records will start getting reflected in the Mach5 index corresponding to the Iceberg database table specified
Verify an ingest pipeline
In Ingest Pipelines page verify if the ingestion pipeline is created properly
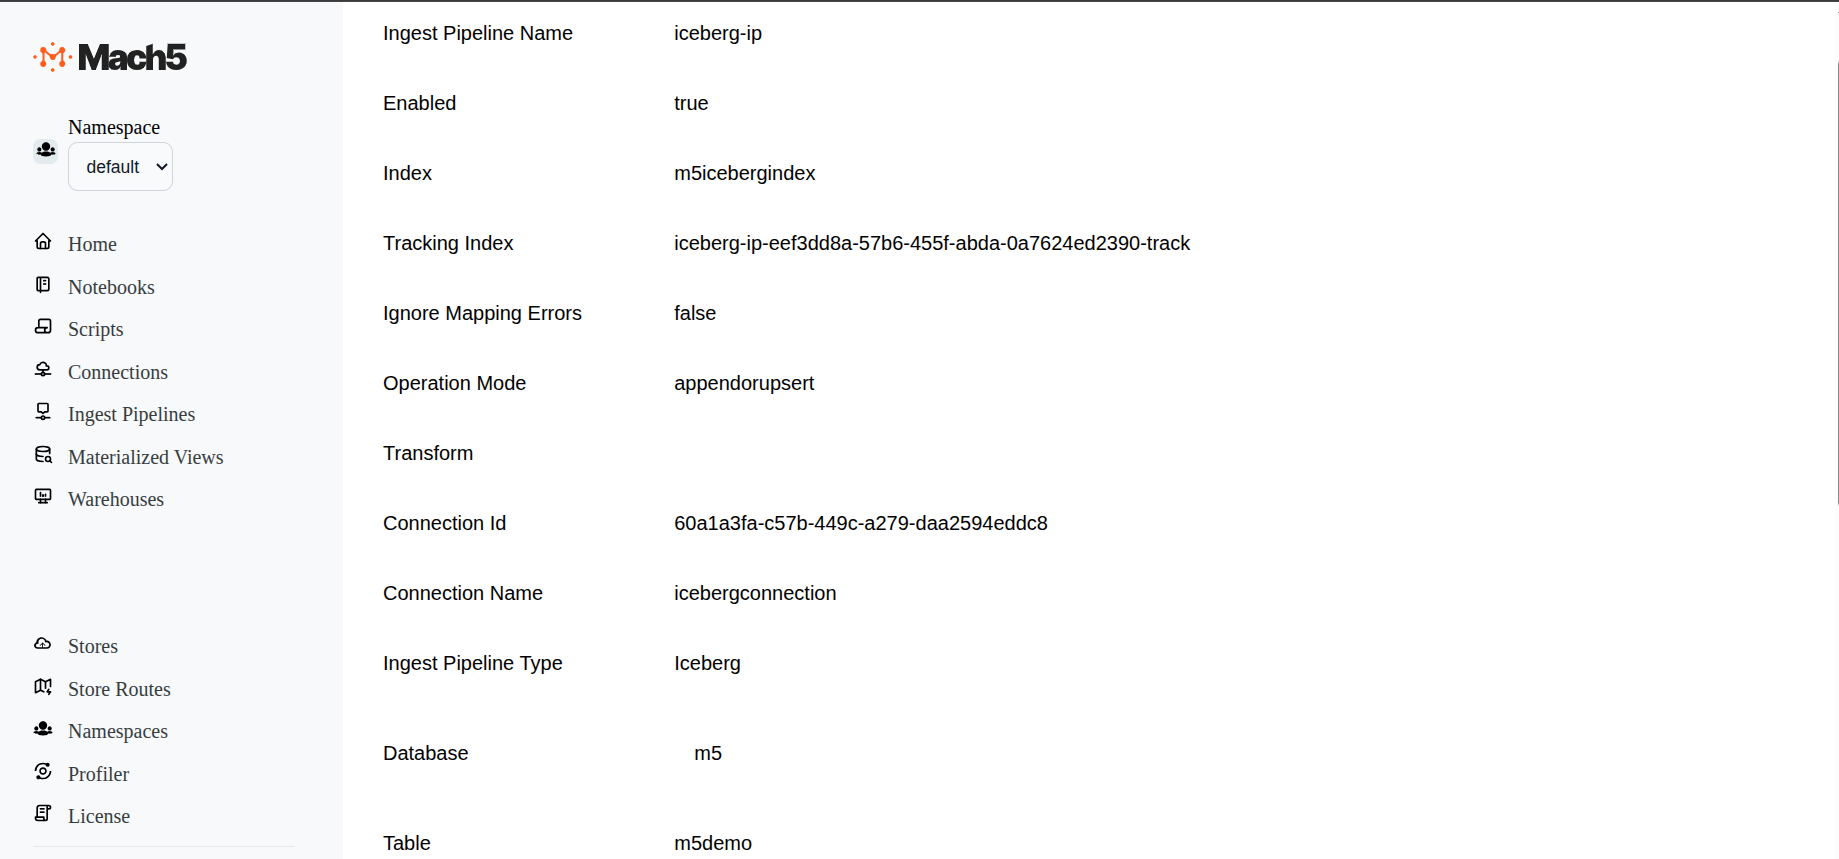
Once the iceberg-ip ingestion pipeline is successfully created, records from Iceberg table are ingested into Mach5 index m5icebergindex. As and when new data is added into Iceberg table, it will get added into the Mach5 index
Verify data ingestion
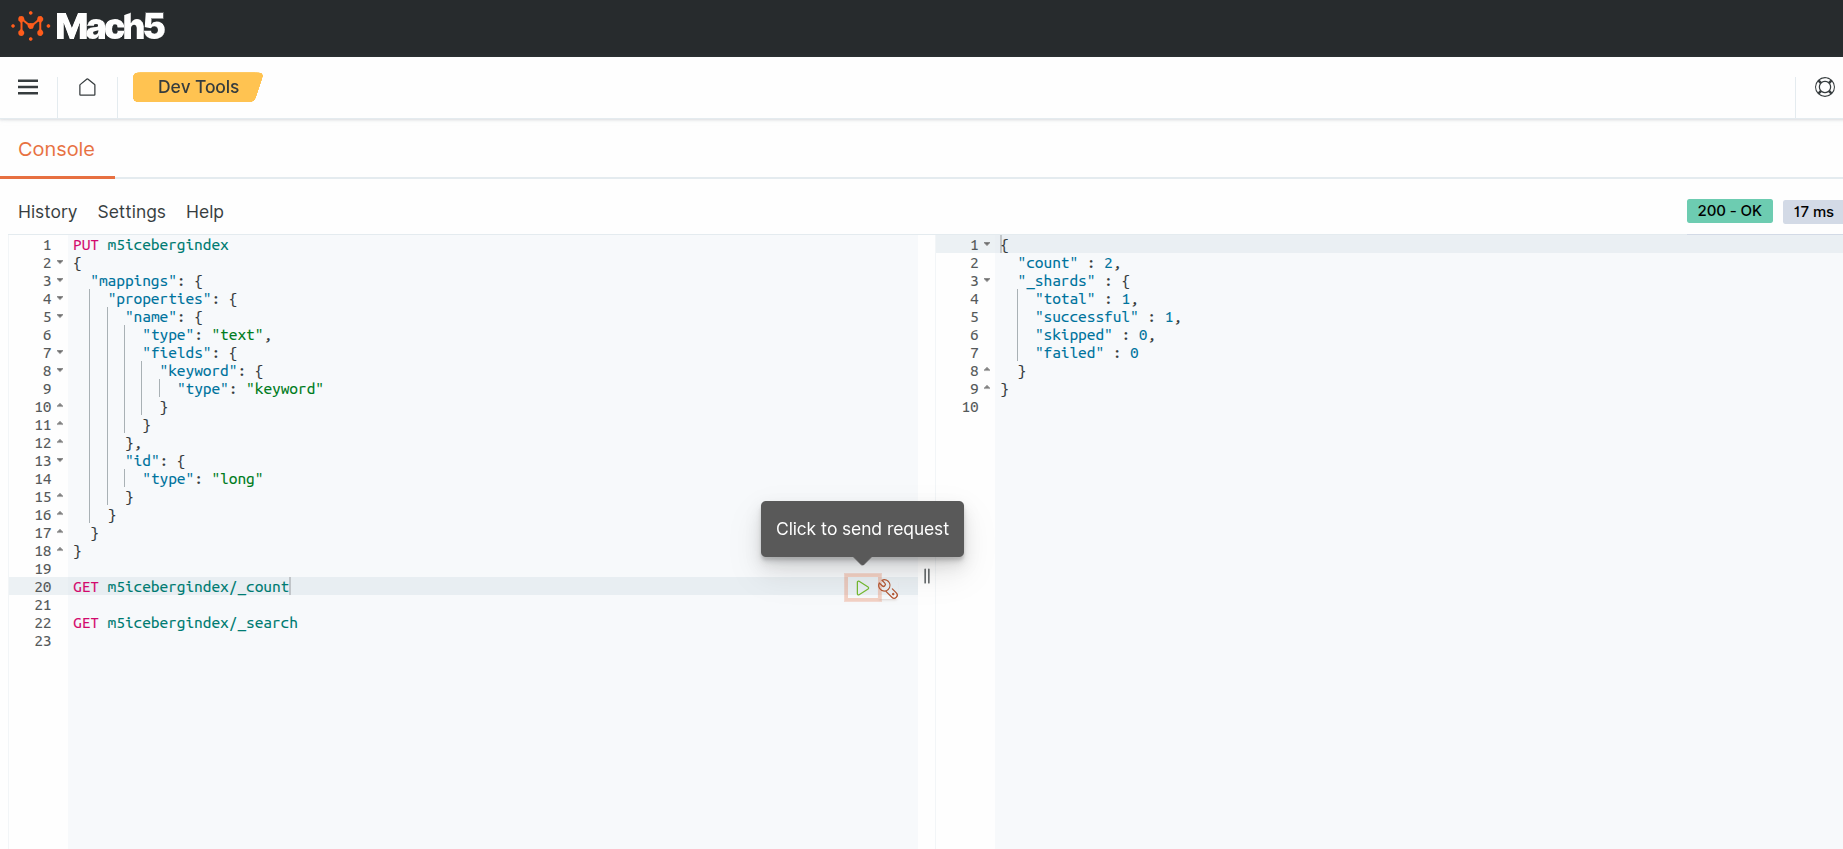
Using Mach5 Dashboards - Dev Tools, verify that the data from Iceberg is ingested into Mach5
- Execute a count query on the Mach5 index to verify the number of ingested records. As expected, the count is 2 records. This is what was ingested into Iceberg table m5demo, refer to Prerequisites
- Execute a search query on the Mach5 index to verify the ingested records.
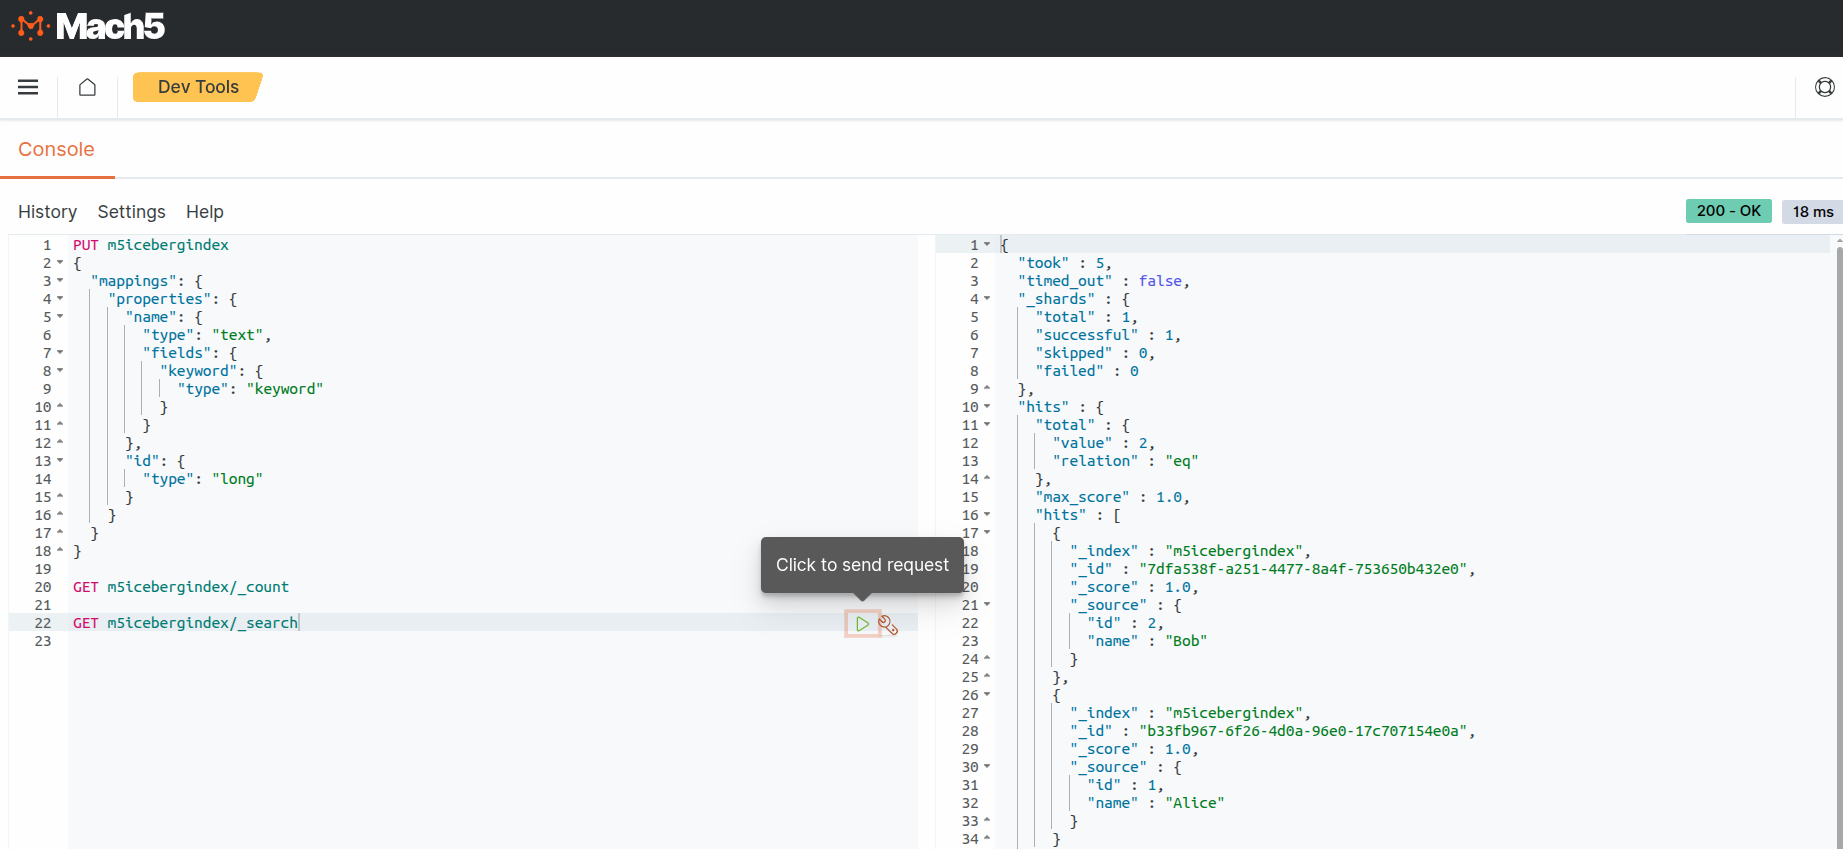
As expected, the output shows 2 records. This is what was ingested into into Iceberg table m5demo, refer to Prerequisites
Disable ingest pipeline
When not in use, ingest pipeline can be disabled. So any updates to source data are not reflected in Mach5

- To Disable an existing pipeline, click on the Edit icon next to the the ingest pipeline, eg. iceberg-ip
- In the Edit ingest pipeline page, at end of all options, before Save button, deselect the Enabled checkbox
- Save the ingest pipeline to take effect
- The iceberg-ip ingest pipeline is now disabled. It will not read data from source to ingest data into Mach5. It can be enabled any time it needs to be re-used
Troubleshooting
Issue: Ingest pipeline does not work and no new pods are being spawned
- Symptom: The ingest pipeline appears to be configured but no data is ingested.
- Cause: The Mach5 index referenced in the ingest pipeline does not exist.
- Resolution: Ensure that the required Mach5 index is created before configuring or enabling the ingest pipeline.