Mach5 Quickstart Guide
Getting Started
This is a quick start document for Mach5. This document outlines the process to initialize Mach5 Search, including the creation of stores, store routes, and warehouses. It also details how to add an index and sample data, run sample queries and searches from Mach5.
Prerequisites
- This document assumes that Mach5 is deployed and running successfully
- Mach5 Administrative UI is accessible at http://localhost:8888
In Mach5 - Namespace default is already pre-existing
Store and Store Routes
To initialize Mach5 Search, a store and a corresponding store route must be configured. A store is the object storage location where Mach5 will store index data. A store route decides which store a newly created index should use, based on the index name, an optional namespace regex, and a numeric priority. Routing happens only at index creation time; after an index is created, changing store routes does not move that index. Use caution when deleting a store and its store route. Deletion will remove access to all data stored in Mach5.
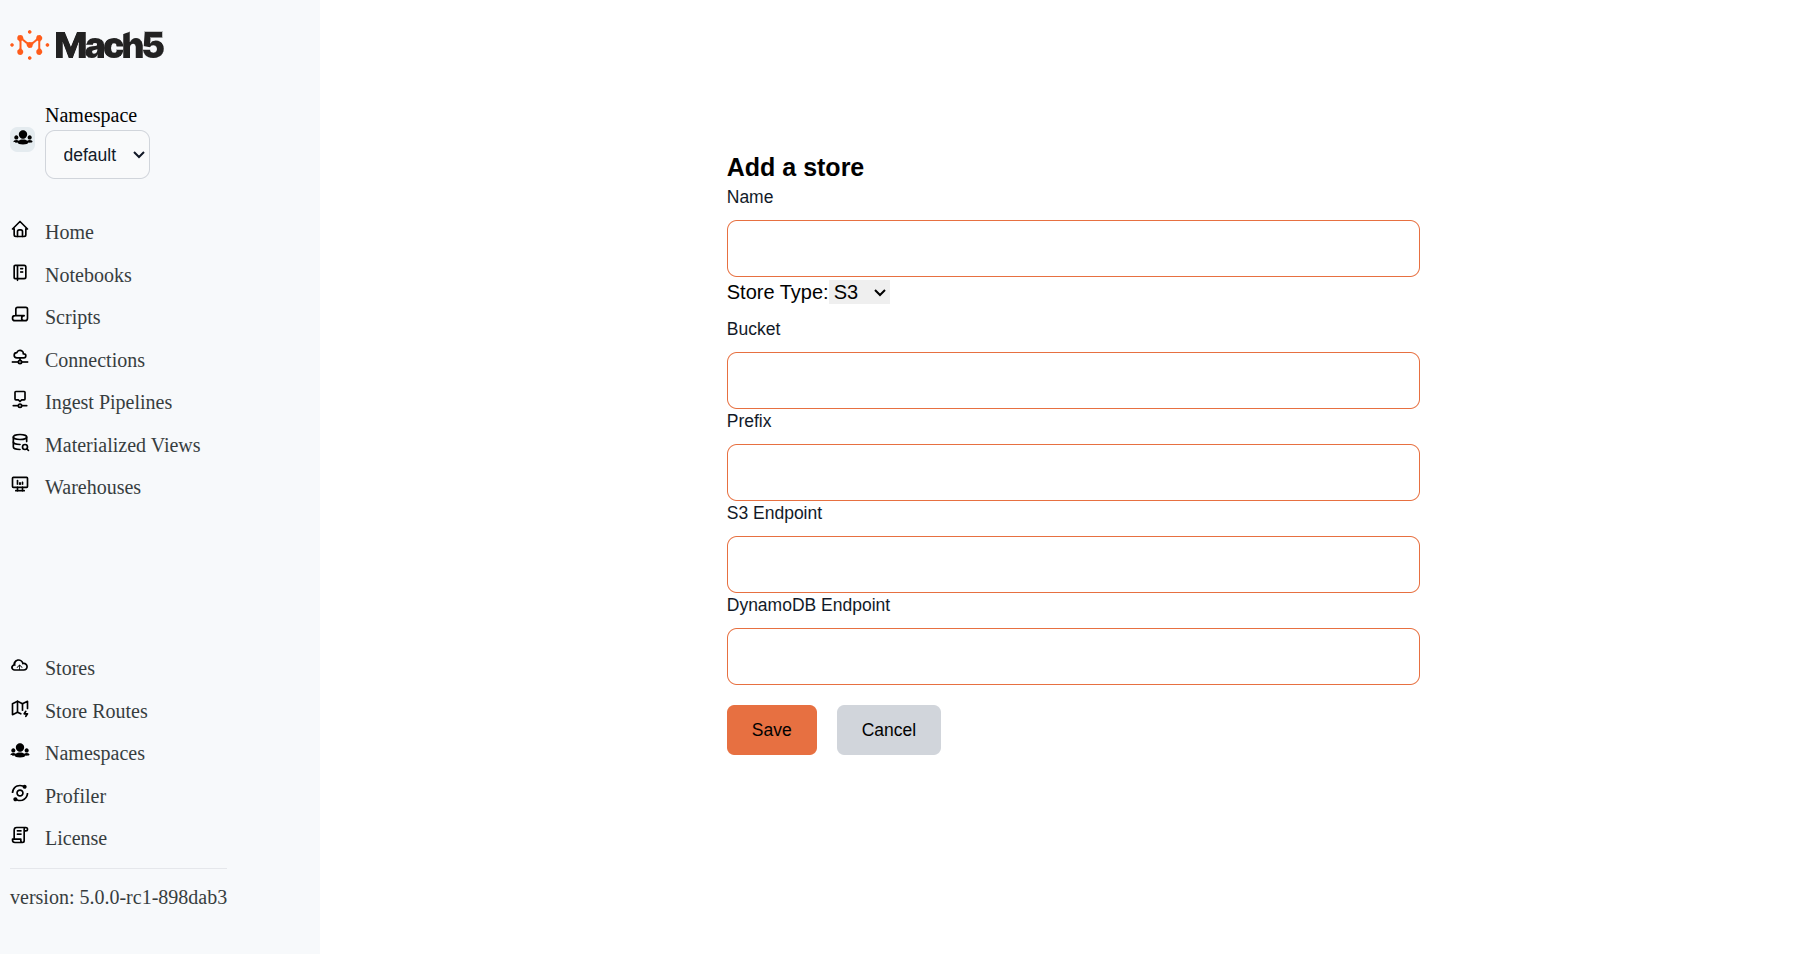
Add a Store
- Click on Stores on the left panel of Mach5 UI. Add a new store by clicking the + icon on rightmost corner of the page
- Name: Provide name of the new store, eg. teststore
- Store Type: Store Type can be S3, Gcs, Abs. Select S3
- Bucket: Type name of an already existing bucket in S3, eg. testbucket
- Prefix: Specify a prefix name, eg. mach5store. All data will be stored under this prefix inside testbucket in S3
- S3 Endpoint: Keep it as empty. On AWS EKS, configuration of S3 Endpoint is not needed.
- If you are using local S3 deployment, for eg Minio then define this endpoint, eg. http://<Minio host>:<Minio port>
- DynamoDB Endpoint: Keep it as empty. On AWS EKS, configuration of DynamoDB Endpoint is not needed
- If you are not on AWS EKS, specify this as http://dynamodb:8000
- Click on Save
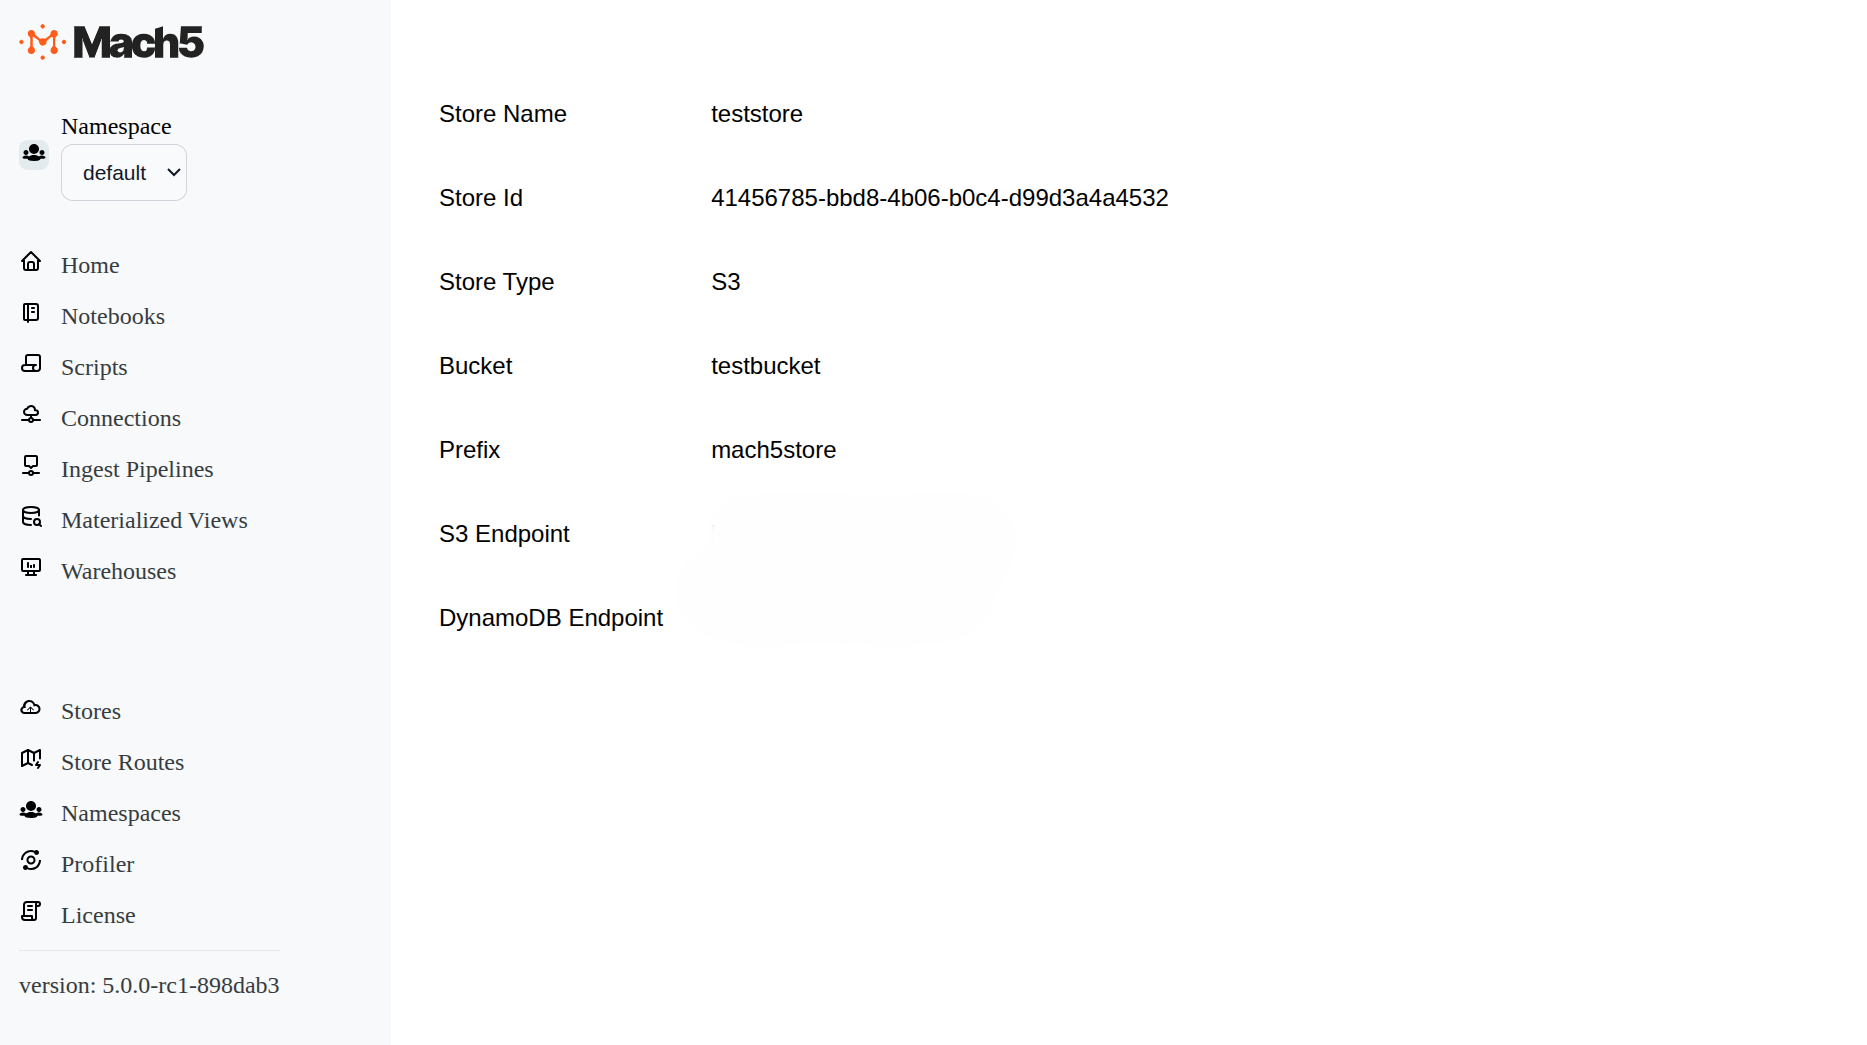
Verify that the Store is created, page shows the details as below for teststore
Add a Store Route
- Click on the Store Routes on the left panel of Mach5 UI. Add a store route by clicking the + icon on rightmost corner of the page
- Pattern: Regex pattern to match the index name. Keep the default pattern as
.*when using a single store to match all indices - Namespace Pattern: Optional regex pattern to match the namespace. When present, namespace-specific routes are evaluated before generic routes. Example:
^default$matches thedefaultnamespace and^prod-.*matches namespaces starting withprod- - Stores: Select the teststore that was created in step above
- Priority: Priority for the store route. Higher numeric priority wins when multiple routes in the same class match. Keep the default value as
10 - Click on Save
For a deeper explanation of stores, regex matching, and priority behavior, see Stores and Store Routes.

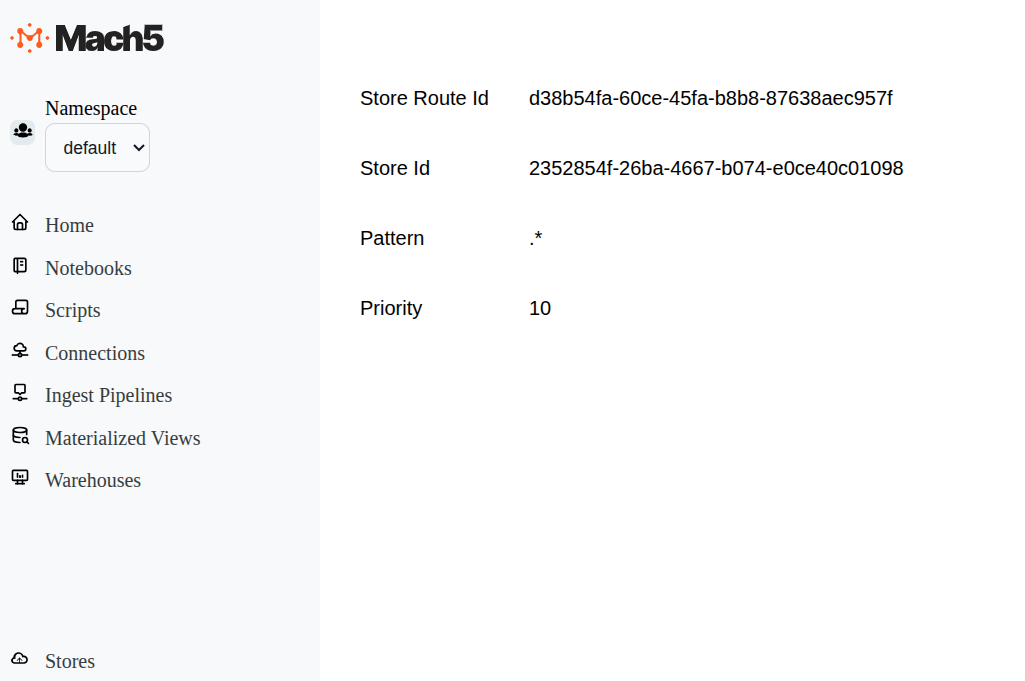
Verify that the Store Routes page shows the details as below. The Store Route id is automatically generated
Warehouse
In Mach5 Search, Warehouses serve as compute resources that allow users to create indices and query data stored in indices
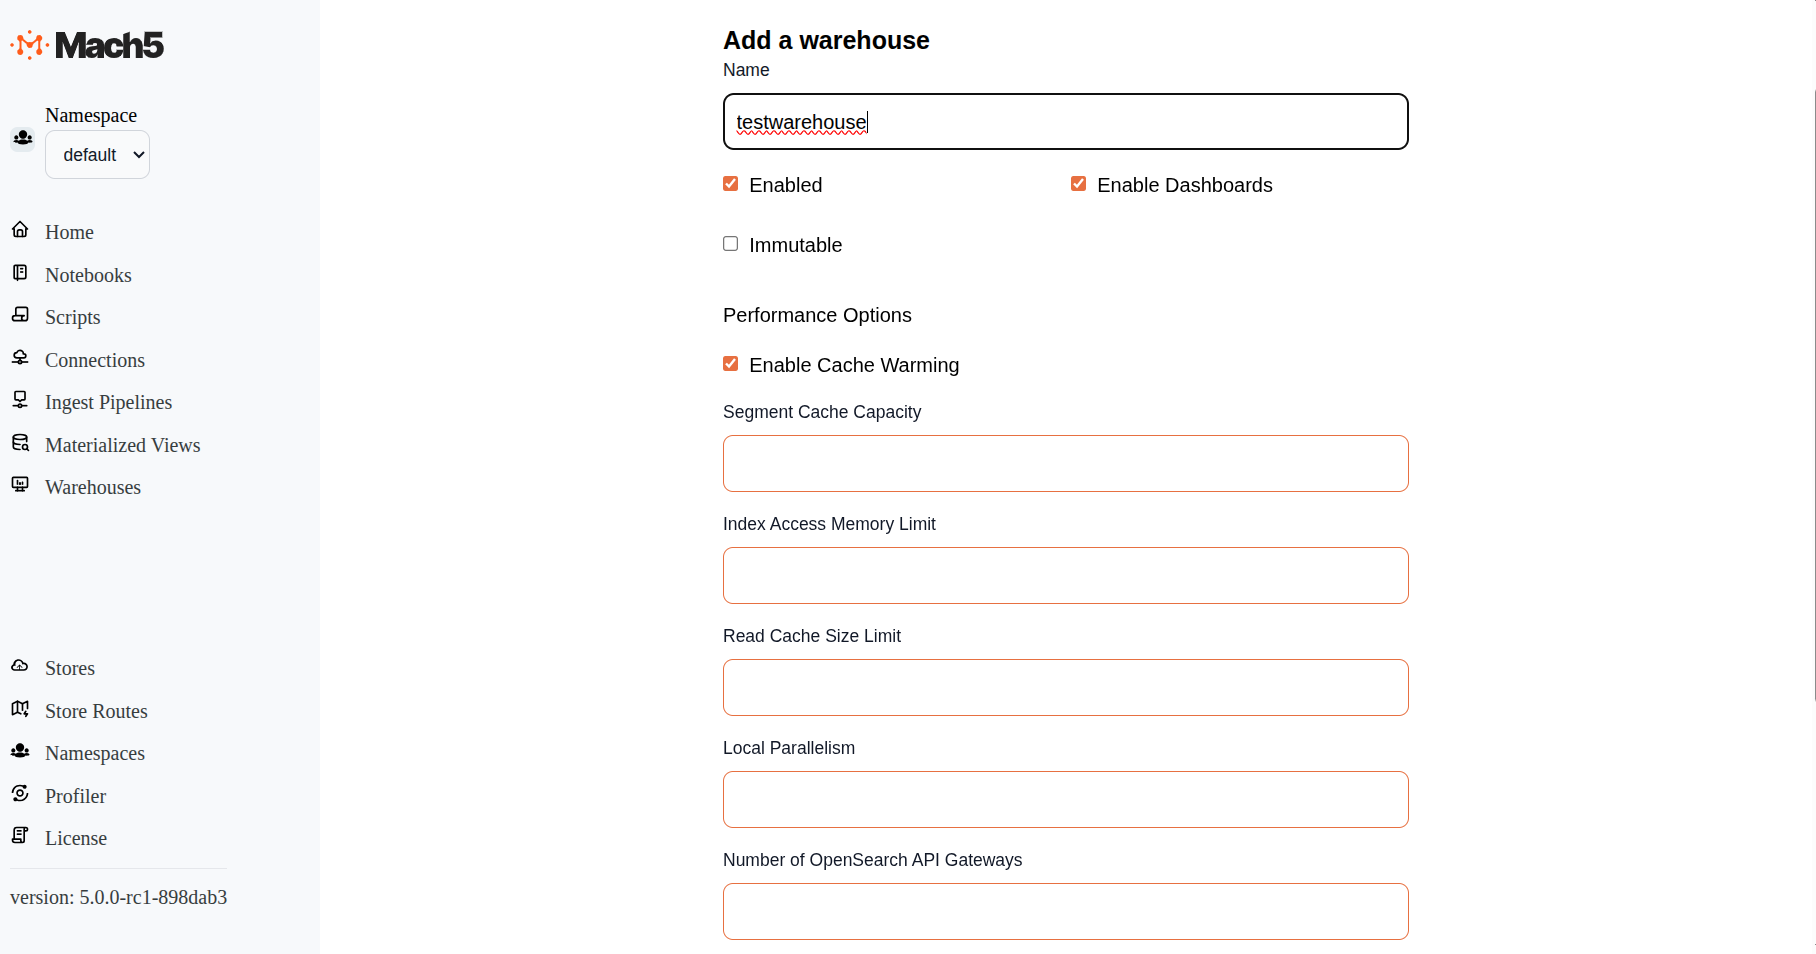
Add a Warehouse
Configure a new warehouse to be able to create indices and run queries in Mach5 by specifying the following:
- Click on Warehouses on the left panel of Mach5 UI. Add a new warehouse by clicking the + icon on rightmost corner of the page
- Name: Provide the name of the new Warehouse, say testwarehouse
- Enabled: Keep default checkbox selection as selected
- Enable Dashboards: Keep default checkbox selection as selected
- Immutable: Keep default checkbox selection as deselected
- Performance Options
- Enable Cache Warming: Keep default checkbox selection as selected
- Segment Cache Capacity: Keep default as empty
- Index Access Memory Limit: Keep default as empty
- Read Cache Size Limit: Keep default as empty
- Local Parallelism: Keep default as empty
- Number of OpenSearch API Gateways: Keep default as empty
- Number of Workers: Keep default as 1
- Replicas: Keep default as empty
- Click on Save
Verify that the Warehouse addition is successful. The Warehouses page shows the details as below:
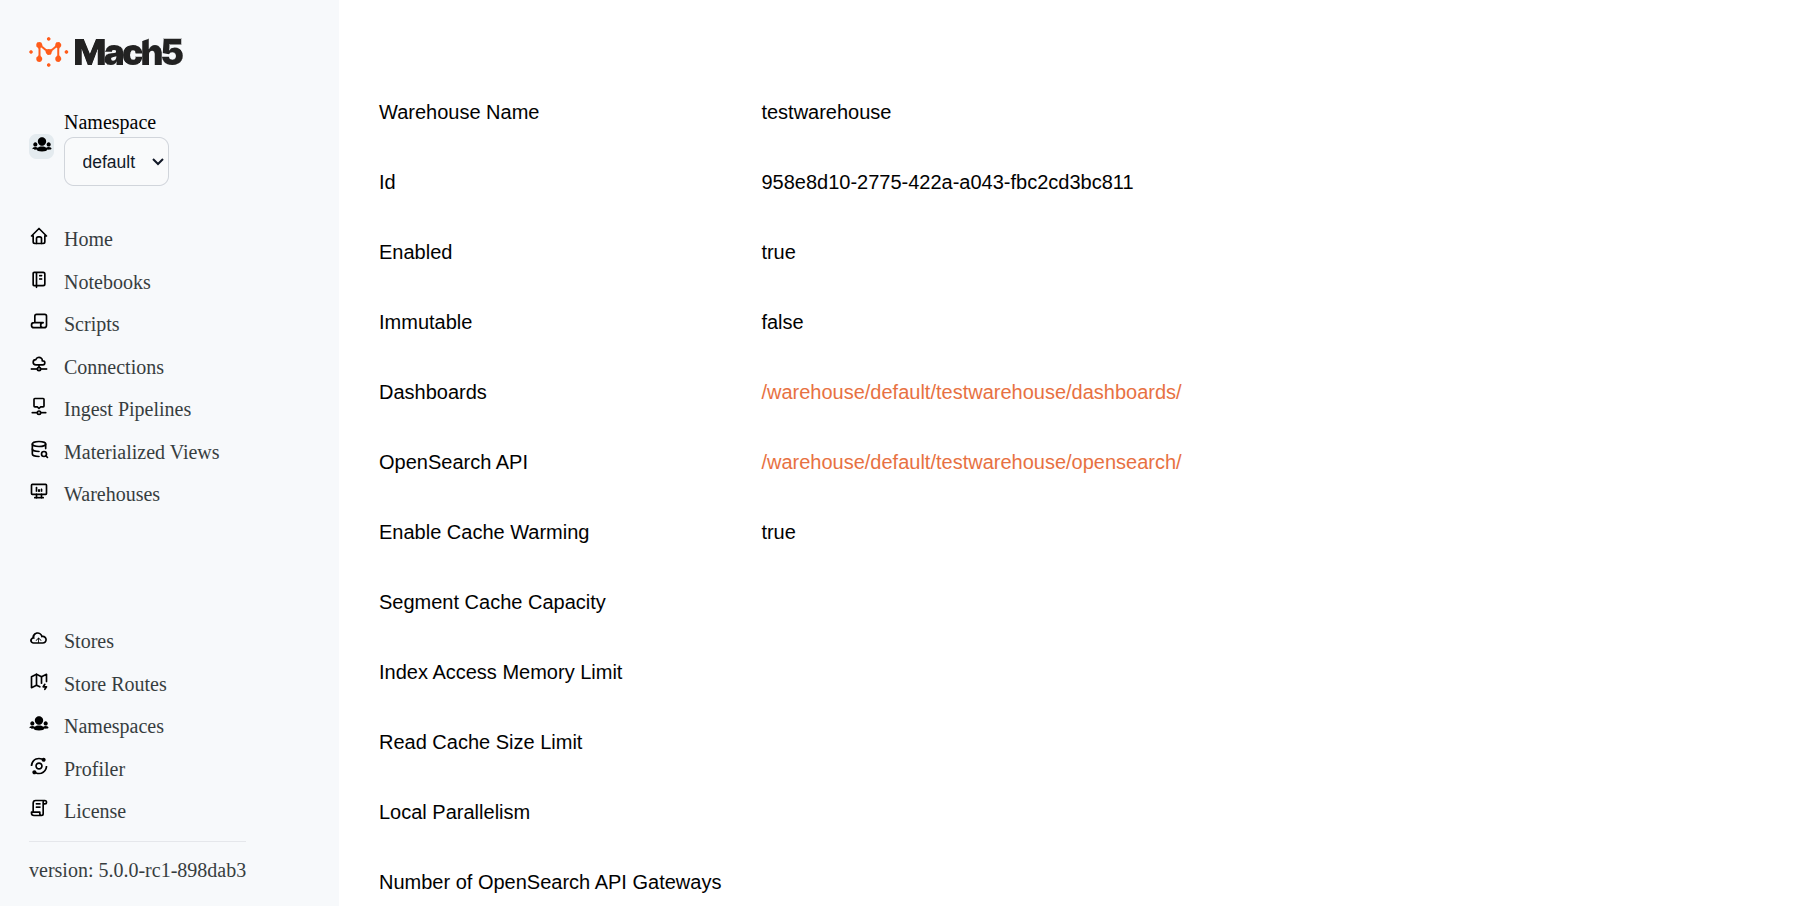
Mach5 should now be successfully initialized. It will take around 1-2 minutes for the system to be accessible
- The warehouse page for testwarehouse has two links for Dashboards and OpenSearch API
- Click on the Dashboards link (http://localhost:8888/warehouse/default/testwarehouse/dashboards/) to access Mach5 Search Dashboards
- Click on the OpenSearch API link (http://localhost:8888/warehouse/default/testwarehouse/opensearch/) to access OpenSearch compatible APIs
Disable a Warehouse
When not in use, Warehouse can be disabled so that resources are not used unnecessarily. Given below are steps to disable a warehouse:
- Navigate to Warehouse page, existing warehouses are listed
- Click on edit action for testwarehouse. This edit symbol is next to delete button
- Deselect checkbox Enabled
- Click Save
- testwarehouse is now disabled

Verify that testwarehouse is disabled. Click on the testwarehouse in Warehouses page and verify that Enabled field is false
Note: Disabled warehouse can be enabled anytime it needs to be re-used
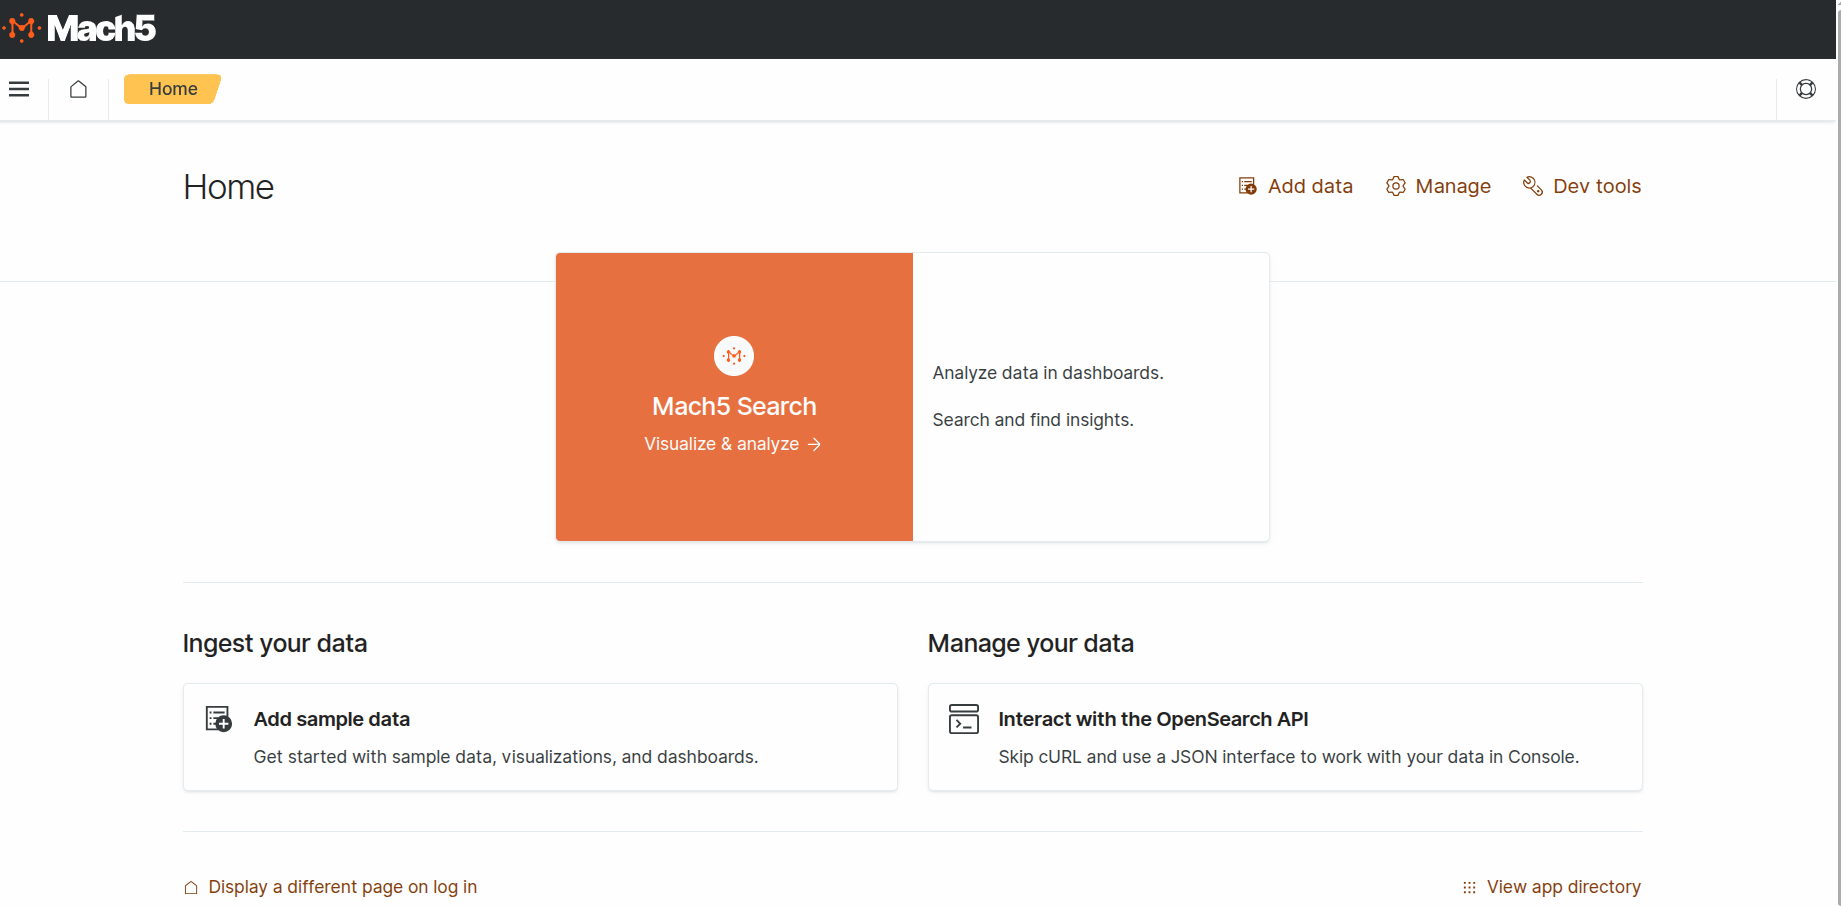
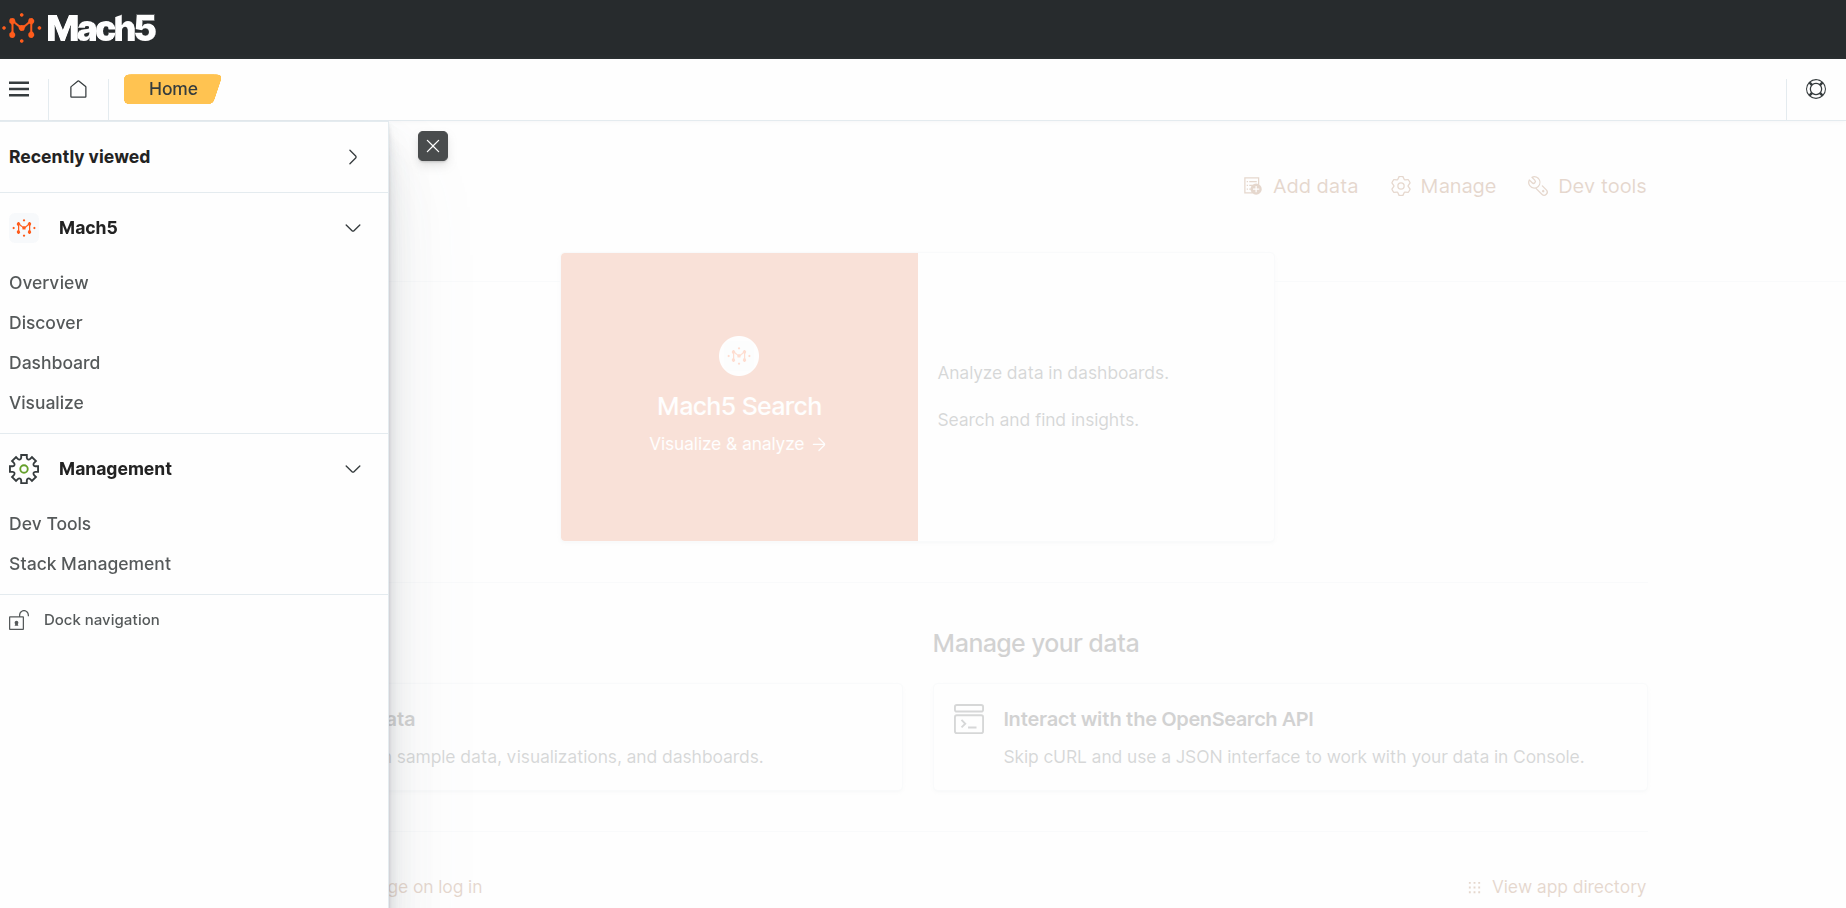
Dashboards
On Warehouse page list, click on testwarehouse. On testwarehouse details, click on -> Dashboards link -> /warehouse/default/testwarehouse/dashboards/ to open the Dashboard page
Add Sample data
- Click “Add Data” for say Sample flights data. Choose the any pre-built dataset of your choice
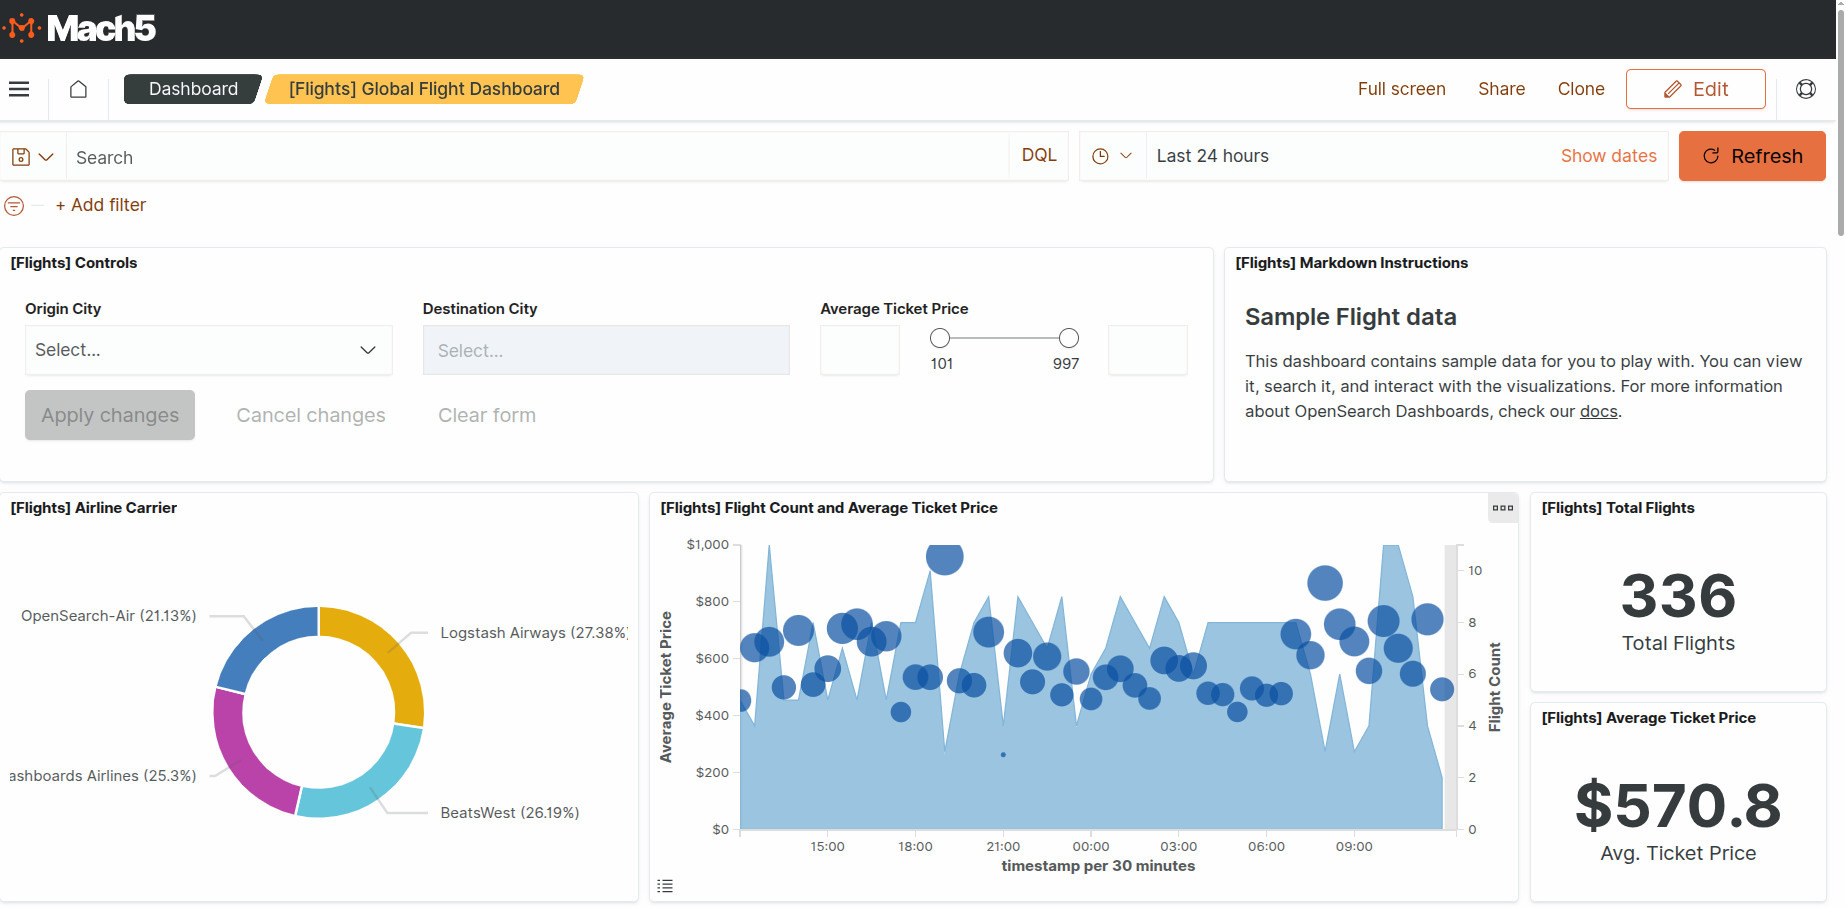
- Once added, click “View Data” to see a pre-built dashboard
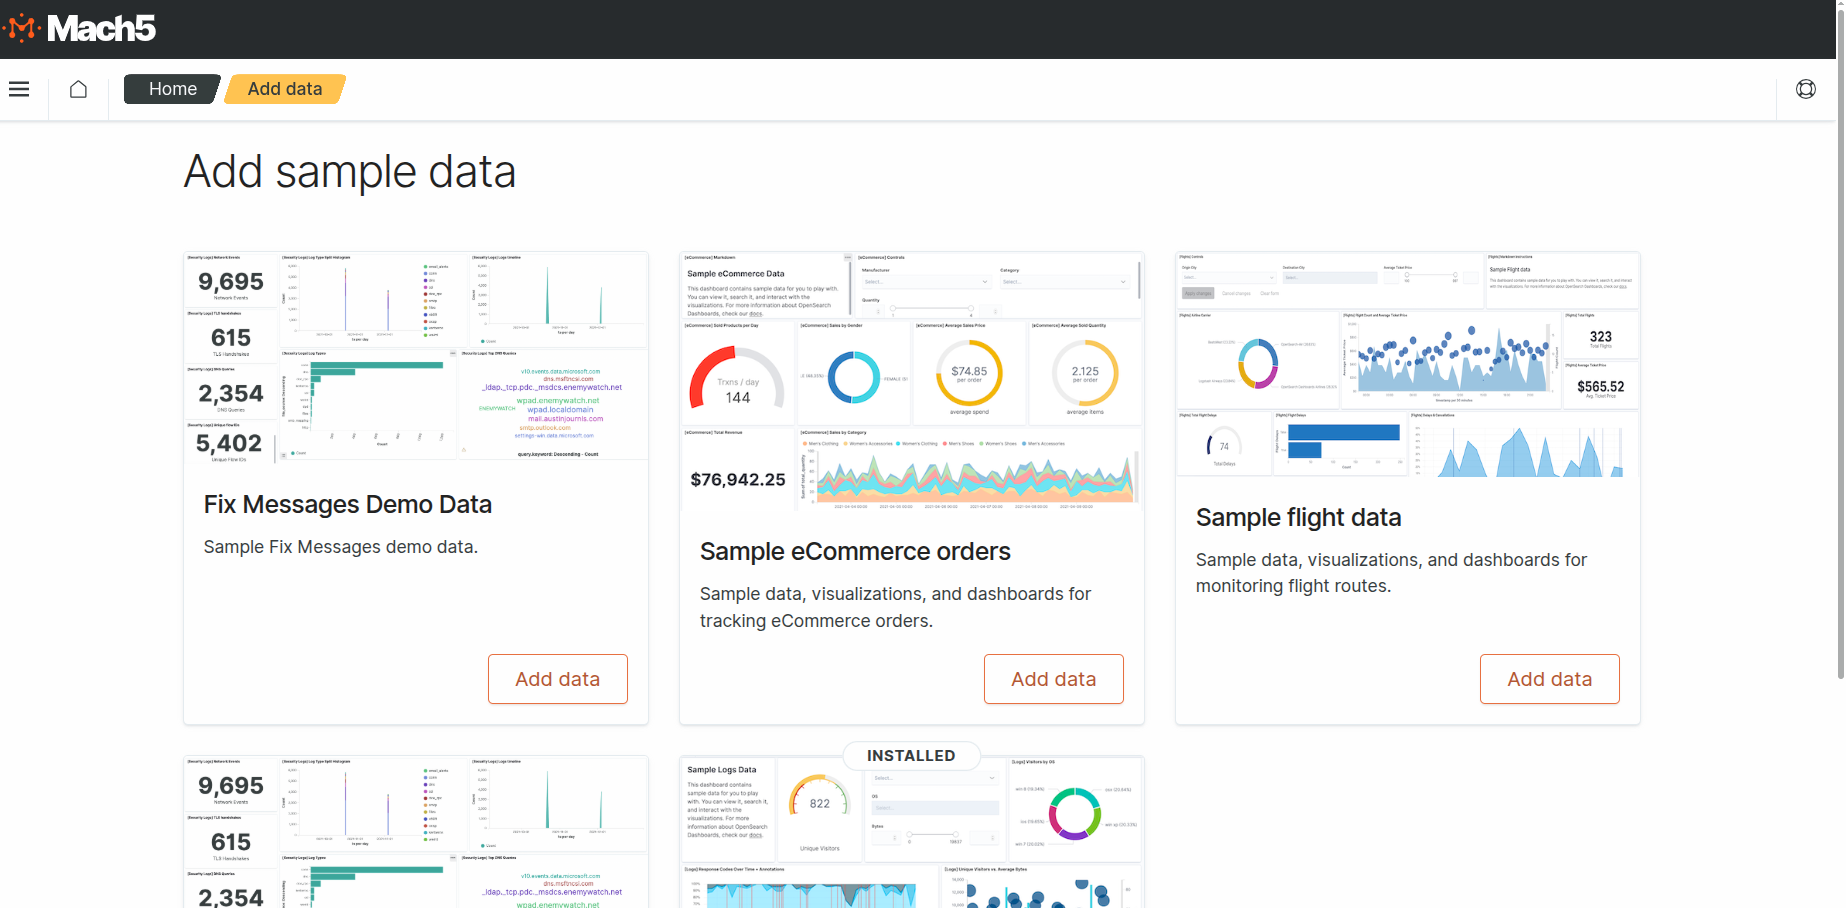
- View data - Sample flights data
Dev Tools to Run Queries in Dashboard
Run queries directly from the Dashboard using Dev Tools. Click on “Interact with OpenSearch API”
OR Click on Dev Tools from side bar
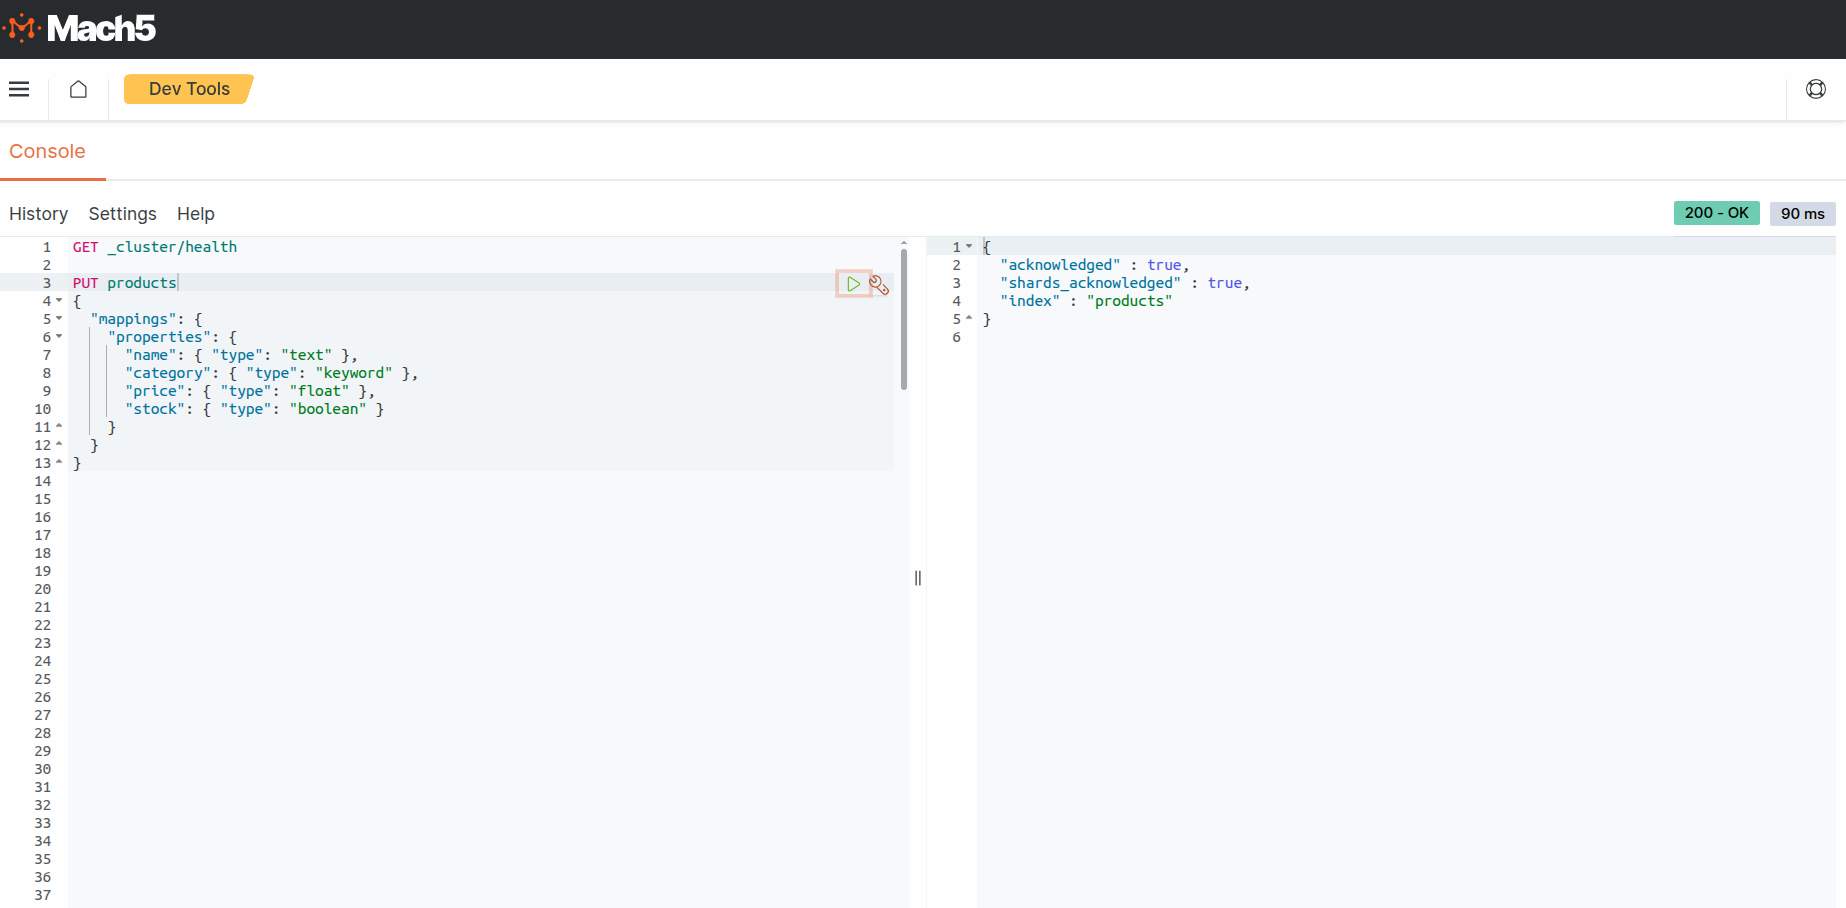
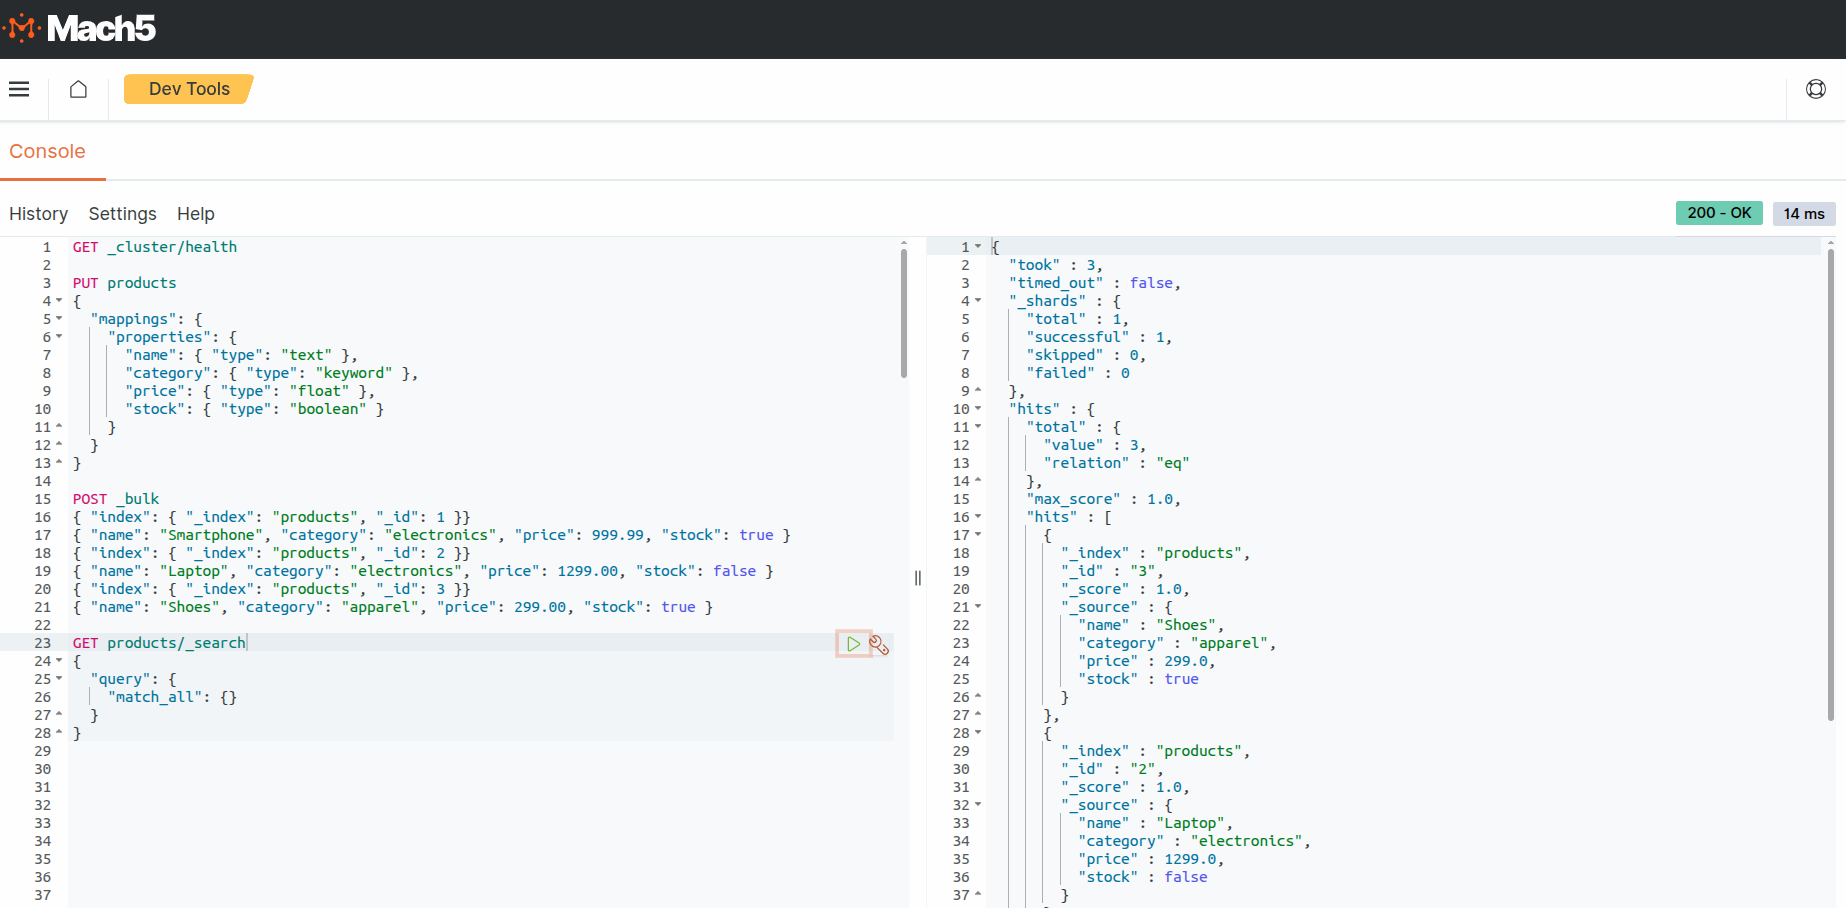
Create an Index
- Create a Mach5 index named products
- On the left pane, type/paste given below data
PUT products
{
   "mappings": {
     "properties": {
       "name": { "type": "text" },
       "category": { "type": "keyword" },
       "price": { "type": "float" },
       "stock": { "type": "boolean" }
     }
   }
}
- Keep cursor on same line as PUT products and click on Play button
- Check output in right pane
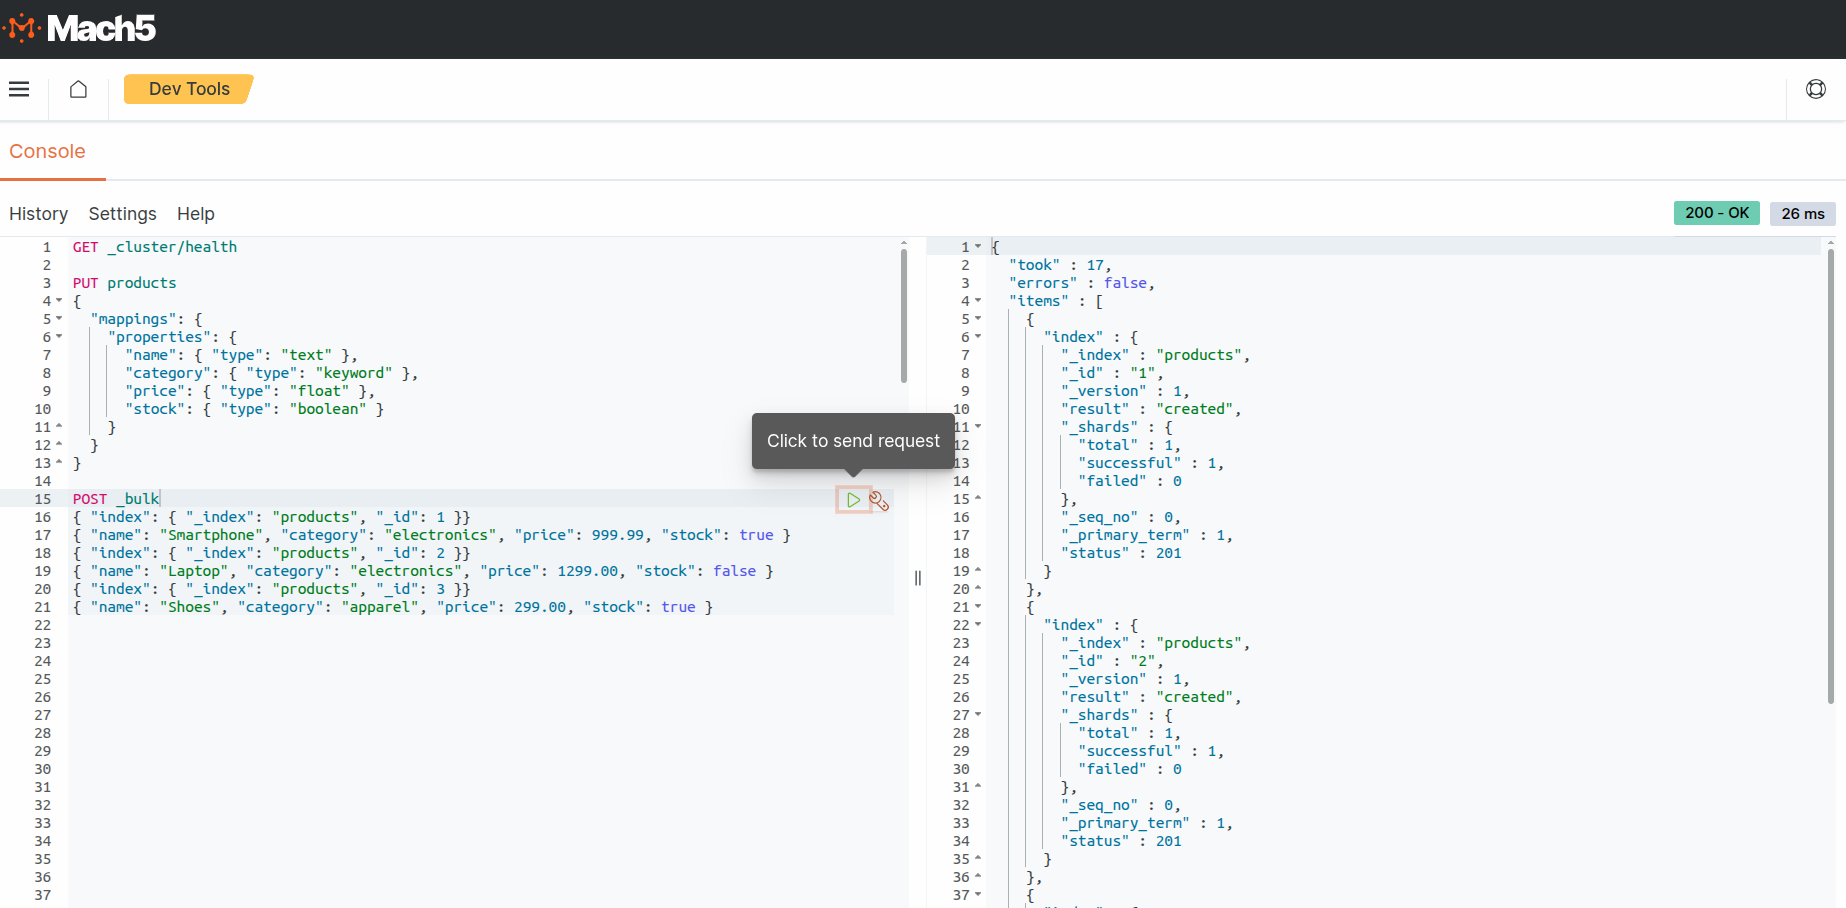
Add data via Bulk API
- Add 3 documents in bulk in the index products that was previously created
- On the left pane, type/paste given below data
POST _bulk
{ "index": { "_index": "products", "_id": 1 }}
{ "name": "Smartphone", "category": "electronics", "price": 999.99, "stock": true }
{ "index": { "_index": "products", "_id": 2 }}
{ "name": "Laptop", "category": "electronics", "price": 1299.00, "stock": false }
{ "index": { "_index": "products", "_id": 3 }}
{ "name": "Shoes", "category": "apparel", "price": 299.00, "stock": true }
- Keep cursor on same line as POST _bulk and click on Play button
- Check output in right pane
Query all documents
- Query the documents that were added in the index products
- On the left pane, type/paste given below data
GET products/_search
{
   "query": {
     "match_all": {}
   }
}
- Keep cursor on same line as GET products/_search and click on Play button
- Check output in right pane
Similarly run all other such queries in Dev Tools
Count Documents
GET products/_count
Filter by category
GET products/_search
 {
   "query": {
     "term": {
       "category": "electronics"
     }
   }
 }
Aggregate by average price
GET products/_search
 {
   "size": 0,
   "aggs": {
     "average\_price": {
       "avg": {
         "field": "price"
       }
     }
   }
}
Delete the index
DELETE products